> ## Documentation Index
> Fetch the complete documentation index at: https://docs.runchat.com/llms.txt
> Use this file to discover all available pages before exploring further.
# Collections
> Hold several images in one Image input, pick which ones flow into the workflow, and swap references without rewiring.
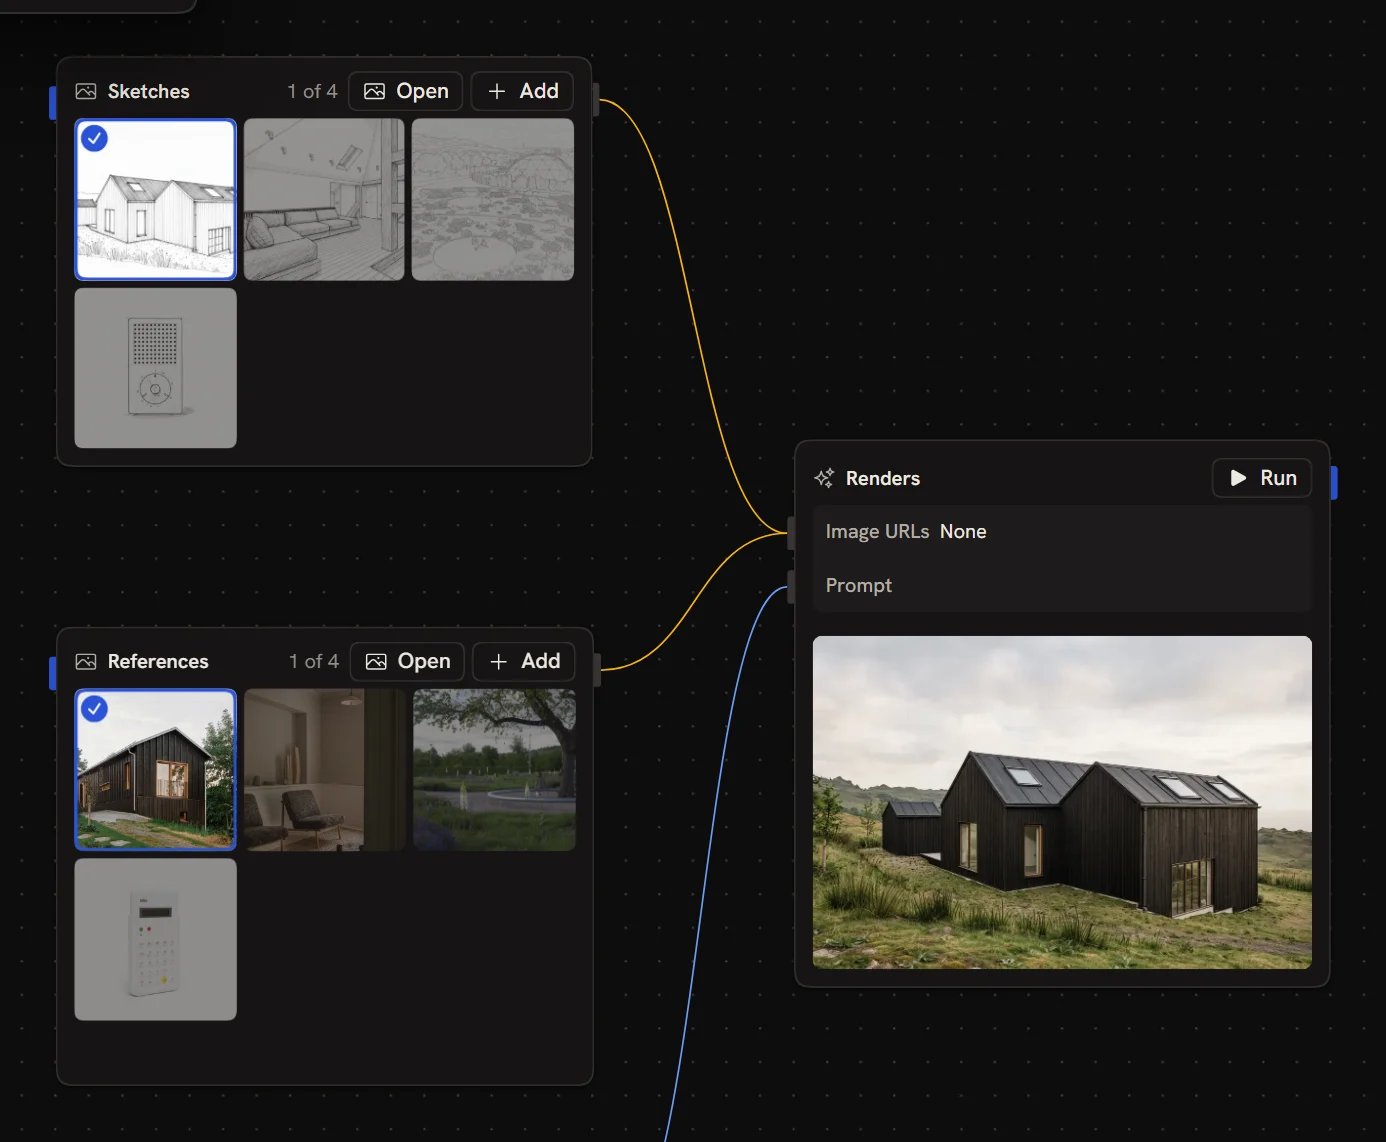
A collection is an Image input that holds more than one image. Only the images you select flow on to the nodes it's connected to, so you can keep a set of sketches, references or materials on the canvas and switch between them without rewiring anything.
Most examples are built this way. Open one, pick the sketch and the reference you want, click **Run**, and you get one result. Pick different images and run again to try another combination.
 ## Adding images
Click **Add** on an Image input to upload more images, or drop image files onto the node. As soon as it holds more than one image, the node shows them as a grid with a count such as **1 of 4**.
To add images from elsewhere, click **Open** to open the collection, then:
* **Upload**: choose files from your computer
* **Paste a link**: add an image from a URL
* **Import from** > **Your assets**: pick images you've generated or uploaded before, searchable by prompt
## Choosing which images flow on
Click an image on the node to select it, and click it again to deselect it. Unselected images are dimmed.
* **Some images selected**: only those images flow on.
* **Nothing selected**: every image flows on.
The selection is saved with the workflow, so anyone who opens it, or runs it as a tool, gets the same images.
To run a node once per image instead of once overall, clear the selection so every image flows on, then set the list-handling chip on the receiving input to **Each**. See [Data Matching](/concepts/data/data-matching).
## The collection editor
Click **Open** on the node (or double-click its grid) to open the collection full size.
## Adding images
Click **Add** on an Image input to upload more images, or drop image files onto the node. As soon as it holds more than one image, the node shows them as a grid with a count such as **1 of 4**.
To add images from elsewhere, click **Open** to open the collection, then:
* **Upload**: choose files from your computer
* **Paste a link**: add an image from a URL
* **Import from** > **Your assets**: pick images you've generated or uploaded before, searchable by prompt
## Choosing which images flow on
Click an image on the node to select it, and click it again to deselect it. Unselected images are dimmed.
* **Some images selected**: only those images flow on.
* **Nothing selected**: every image flows on.
The selection is saved with the workflow, so anyone who opens it, or runs it as a tool, gets the same images.
To run a node once per image instead of once overall, clear the selection so every image flows on, then set the list-handling chip on the receiving input to **Each**. See [Data Matching](/concepts/data/data-matching).
## The collection editor
Click **Open** on the node (or double-click its grid) to open the collection full size.
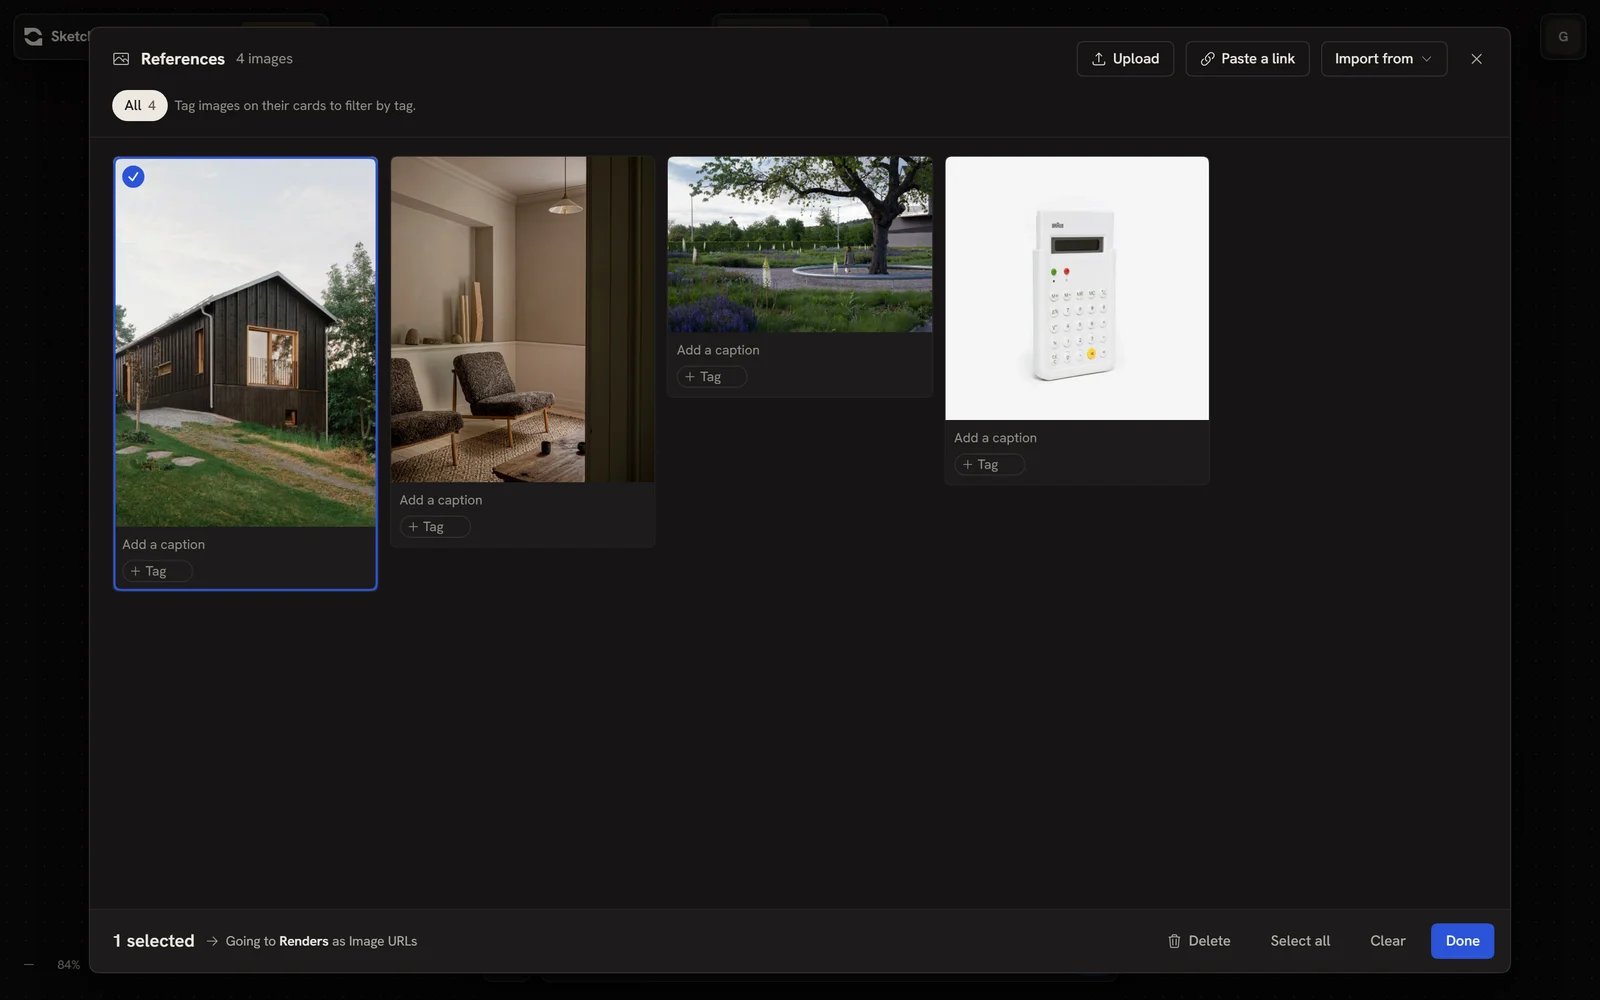 The footer tells you what will happen when the workflow runs: how many images are selected (or **All 4 flow on** when none are) and which node and input they're **Going to**.
From here you can:
* Click images to select or deselect them, or use **Select all** and **Clear**
* **Add a caption** to an image
* Add a **Tag** to an image, then click the tag chips at the top to filter the collection by tag
* **Delete** the selected images
Click **Done** or press `Esc` to close it.
## Next steps
* [Image editor](/concepts/editor/image-editor): mark up and edit a single image
* [Data Matching](/concepts/data/data-matching): how lists of images pair up with other inputs
* [File input](/node-reference/nodes/inputs/file): other file types you can bring into a workflow
This documentation is built and hosted on [Mintlify](https://mintlify.com), a developer documentation platform.
The footer tells you what will happen when the workflow runs: how many images are selected (or **All 4 flow on** when none are) and which node and input they're **Going to**.
From here you can:
* Click images to select or deselect them, or use **Select all** and **Clear**
* **Add a caption** to an image
* Add a **Tag** to an image, then click the tag chips at the top to filter the collection by tag
* **Delete** the selected images
Click **Done** or press `Esc` to close it.
## Next steps
* [Image editor](/concepts/editor/image-editor): mark up and edit a single image
* [Data Matching](/concepts/data/data-matching): how lists of images pair up with other inputs
* [File input](/node-reference/nodes/inputs/file): other file types you can bring into a workflow
This documentation is built and hosted on [Mintlify](https://mintlify.com), a developer documentation platform.