> ## Documentation Index
> Fetch the complete documentation index at: https://docs.runchat.com/llms.txt
> Use this file to discover all available pages before exploring further.
# Render from a Rhino screenshot
> Generate a styled render from a Rhino screenshot, then carry that style across multiple views
Take a screenshot from your 3D model, write one strong prompt, and produce a styled render. Then branch the prompt into variations and apply the locked-in style across other views of the same building.
**Time:** 12 minutes
**You'll need:** A 3D model in Rhino (or any 3D tool), or just a screenshot to start with
For more on the techniques in this example, see also [render variations (3 min)](https://youtu.be/PXOL_38FA-8) and [producing render sets (8 min)](https://youtu.be/F6KKGEv7Vhk).
## 1. Get a strong baseline render
Start by feeding two things into a [Create](/node-reference/nodes/create) node with Nano Banana Pro:
* A clean **line drawing** screenshot from Rhino (pen linework, not shaded). Colours and shading in your screenshot muddy the output.
* A prompt that names three things: lighting, material, and a named reference.
Example prompt:
```text theme={null}
Coloured editorial architectural photograph of a realistic house in the
forest, raking side light, deep shadow, tactile white materials,
large-format medium, Hélène Binet style. Surrounded by lush vegetation.
```
Steal this shape for your own prompts. Swap the lighting, material, and named reference and you have a new look without starting from scratch.
### What controls the output
* **Aspect ratio**: match the output aspect ratio to your screenshot. Output portrait if your screenshot is portrait.
* **Image order**: Nano Banana is most influenced by the last image you provide. Put the screenshot you want to render *last*.
* **Switch to Pro for client work**: Nano Banana Pro handles ambiguity better, especially when references and screenshots have different camera angles. The cost is worth it for ship-quality output.
## 2. When the model returns the wrong thing
Two failure modes are common when you're rendering against a reference:
**The model returns the reference instead of editing the screenshot.**
Use the **thumbnail technique**: paste your screenshot as a small thumbnail inside the reference image. Now you have a single image with both, and the model pays attention to the main frame while staying influenced by the thumbnail.
**The model just returns the screenshot unchanged.**
This happens when the reference and screenshot are very similar. The thumbnail technique fixes this too.
For a deep dive on these techniques and more, see the [12 ways to improve your Nano Banana images](https://youtu.be/Ck1cW7q5bmM) walkthrough.
## 3. Write a multi-step prompt for control
When you need fine control over photographic qualities (film grain, vignetting, light balance), write the prompt as a sequence of steps rather than one sentence:
```text theme={null}
1. Produce a photograph of the line drawing.
2. Maintain the exact geometry and perspective of the line drawing.
3. Add people like in the reference image.
4. Match the photographic qualities: film grain, vignetting, light and
shadow balance.
5. Remove the thumbnail from the final image.
```
Why this works: the model internally generates and checks against your prompt. A multi-step prompt gives it something to judge against at each step.
When matching photographic qualities, name them specifically:
* Film grain
* Vignetting
* Light and shadow balance
* Colour palette
* Activity and people
* Greenery or context
## 4. Branch the prompt with an agent
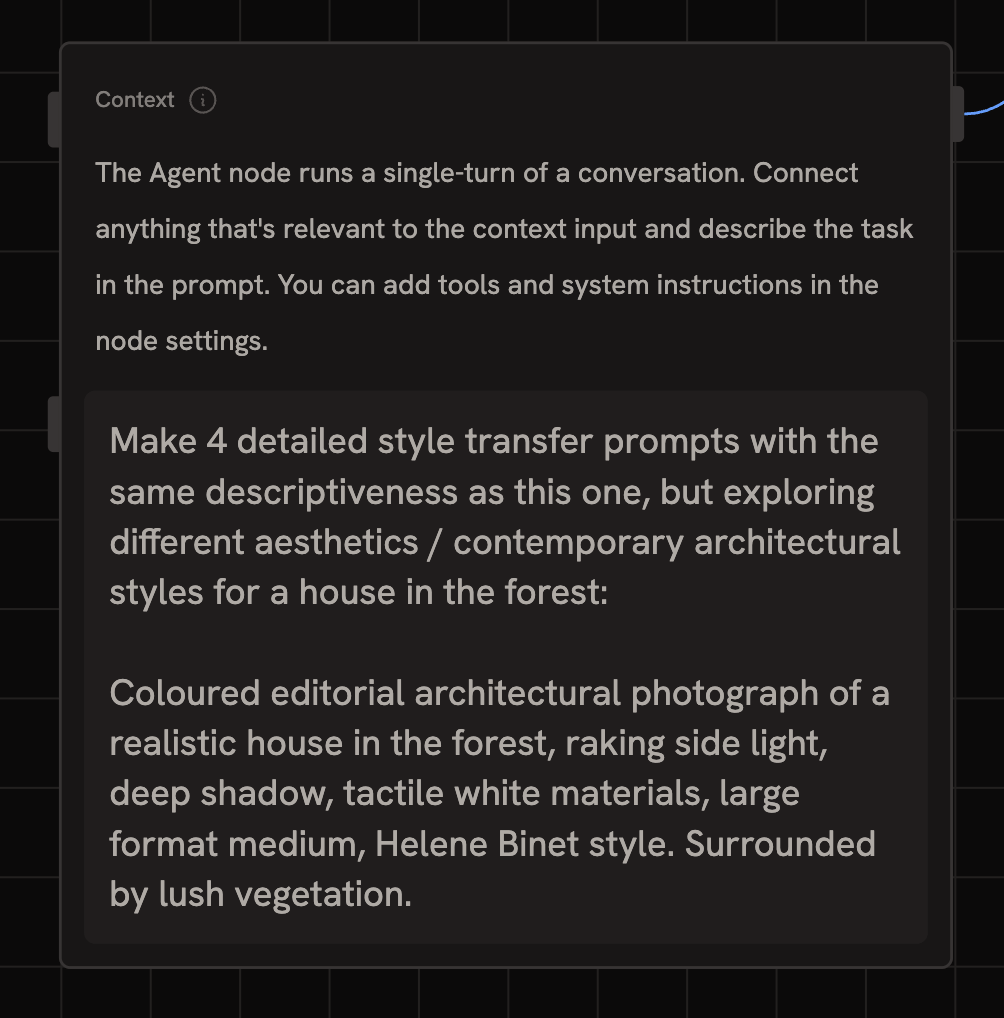
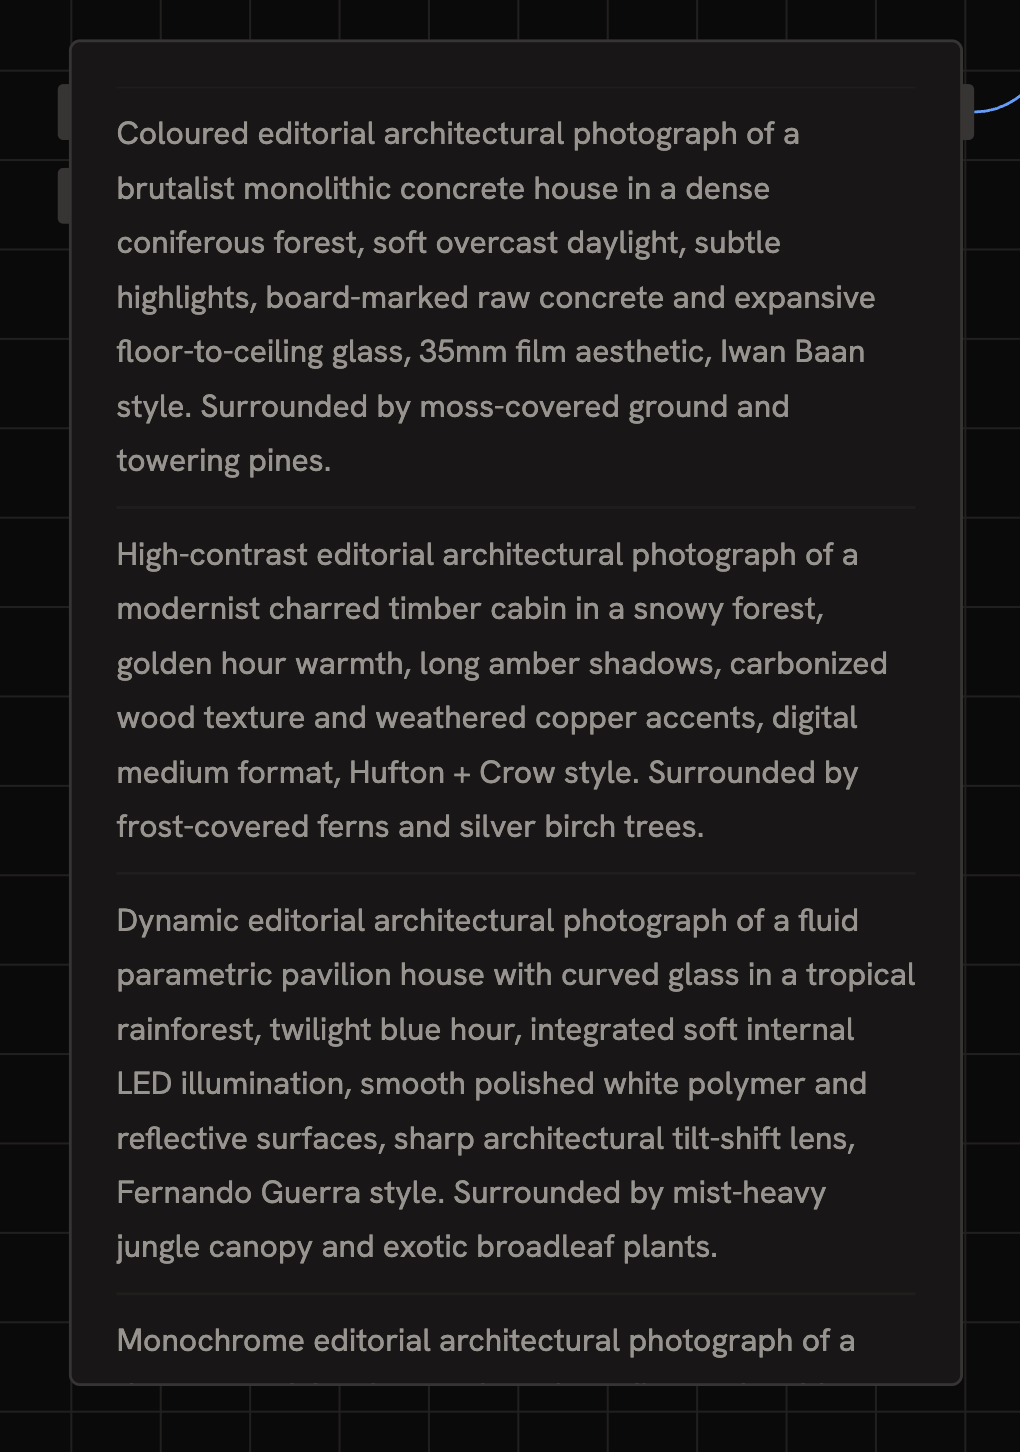
Once your baseline render works, generate stylistic variations by feeding the prompt through an [Agent](/node-reference/nodes/agent) node:
1. Add an Agent node
2. Set output format to **list**
3. Connect your original prompt as context
4. Prompt the agent: `Generate 4 variations of this prompt that explore different photographic styles.`
5. Connect the agent's list output to a new Create node
6. Each list item becomes a separate render
You now have a series of stylistic options to pick from.
## 5. Carry the style across other views
Once one variation works, lock it in and apply it to other angles of the same building:
1. Take the finished render and crop it to just the building (remove surroundings).
2. Collage it into the top-left of a new screenshot from a different angle.
3. Prompt Nano Banana Pro: *"Apply the style from the top left to the main image. The screengrab shows the same building from a different angle. The vegetation and surroundings must match the new camera position."*
Keep this second prompt simpler than the first. The hard work was done in the baseline.
Rotating camera angles is one of the hardest things for any image model.
Style-transferring many views in one batch usually fails. Work through them
one at a time, tweaking prompts per view.
## Quick tips
* **Use `@` (or `Tab`)** to inline reference any node's output into a prompt. See [Connecting Nodes](/concepts/editor/connecting-nodes#inline-references-with-tab).
* **Alt-drag** to duplicate a node. **Alt-shift-drag** duplicates with connections.
* **Crop references** before collaging. Less clutter, more focus.
* **Square aspect ratios** for cropped references. Wild aspect ratios produce worse results.
* **Workshop long prompts with the [chat agent](/concepts/agents/chat)** when one isn't producing what you want.
## Next steps
* [Make controlled edits to AI images](/examples/masked-image-edits), fix specific parts of a render with masks instead of regenerating
* [Train a custom LoRA](/examples/training-a-lora), for when reference images can't capture your studio's specific aesthetic
* [Runchat for Rhino](/plugins/rhino), capture screenshots directly from Rhino into a Runchat workflow
 1. Add an Agent node
2. Set output format to **list**
3. Connect your original prompt as context
4. Prompt the agent: `Generate 4 variations of this prompt that explore different photographic styles.`
5. Connect the agent's list output to a new Create node
6. Each list item becomes a separate render
1. Add an Agent node
2. Set output format to **list**
3. Connect your original prompt as context
4. Prompt the agent: `Generate 4 variations of this prompt that explore different photographic styles.`
5. Connect the agent's list output to a new Create node
6. Each list item becomes a separate render
 You now have a series of stylistic options to pick from.
## 5. Carry the style across other views
Once one variation works, lock it in and apply it to other angles of the same building:
1. Take the finished render and crop it to just the building (remove surroundings).
2. Collage it into the top-left of a new screenshot from a different angle.
3. Prompt Nano Banana Pro: *"Apply the style from the top left to the main image. The screengrab shows the same building from a different angle. The vegetation and surroundings must match the new camera position."*
Keep this second prompt simpler than the first. The hard work was done in the baseline.
You now have a series of stylistic options to pick from.
## 5. Carry the style across other views
Once one variation works, lock it in and apply it to other angles of the same building:
1. Take the finished render and crop it to just the building (remove surroundings).
2. Collage it into the top-left of a new screenshot from a different angle.
3. Prompt Nano Banana Pro: *"Apply the style from the top left to the main image. The screengrab shows the same building from a different angle. The vegetation and surroundings must match the new camera position."*
Keep this second prompt simpler than the first. The hard work was done in the baseline.