> ## Documentation Index
> Fetch the complete documentation index at: https://docs.runchat.com/llms.txt
> Use this file to discover all available pages before exploring further.
# Site research with Google APIs
> Build site analysis tools using Streetview, Places, and planning APIs as reusable Runchat components
This example walks through building a complete site research toolkit: pull Streetview imagery for any address, analyse it with an agent, generate immersive 3D environments with Marble, and publish it all as a reusable tool an agent can call. You'll also see how to plug in a third-party planning API for natural-language planning queries.
**Time:** 25 minutes (advanced)
**You'll need:**
* A Google Cloud account with [Streetview](https://console.cloud.google.com/apis/library/street-view-image-backend.googleapis.com), [Places](https://console.cloud.google.com/marketplace/product/google/places.googleapis.com), and [Geocoding](https://console.cloud.google.com/marketplace/product/google/geocoding-backend.googleapis.com) APIs enabled with billing
* Familiarity with the [Code node](/node-reference/nodes/code) and [Credentials](/concepts/integrations/credentials)
## What you're building
By the end of this tutorial you'll have:
* A custom JavaScript component that fetches Streetview images by address
* An agent-driven analyser that summarises planning, heritage, and streetscape features from Streetview imagery
* A Marble 3D environment built from Streetview images, viewable in Rhino
* A reusable Places API tool that an agent can call to answer questions like "how many parks are near this address?"
* A planning API integration for natural-language queries about a site
## 1. Set up your Streetview key
You'll need a Google Maps API key with Streetview enabled. Create one in [Google Cloud Console](https://console.cloud.google.com/apis/library/street-view-image-backend.googleapis.com).
In Runchat, open **Account menu → Manage Secrets**:
1. Add a secret named `streetview` with your API key as the value
2. Set allowed origins to: `https://maps.googleapis.com`
For more on Runchat secrets, see [Credentials](/concepts/integrations/credentials).
## 2. Build the Streetview component
The fastest way is to share the API documentation with the [chat agent](/concepts/agents/chat) and let it build the component:
1. Click **+** in the chat input, add the **Get Website** tool (fetches raw HTML for a given URL)
2. Prompt:
```text theme={null}
Have a look at the Street View API docs at
https://developers.google.com/maps/documentation/streetview/overview
then create an HTML component that lets us specify a street address
and shows us the Street View image.
```
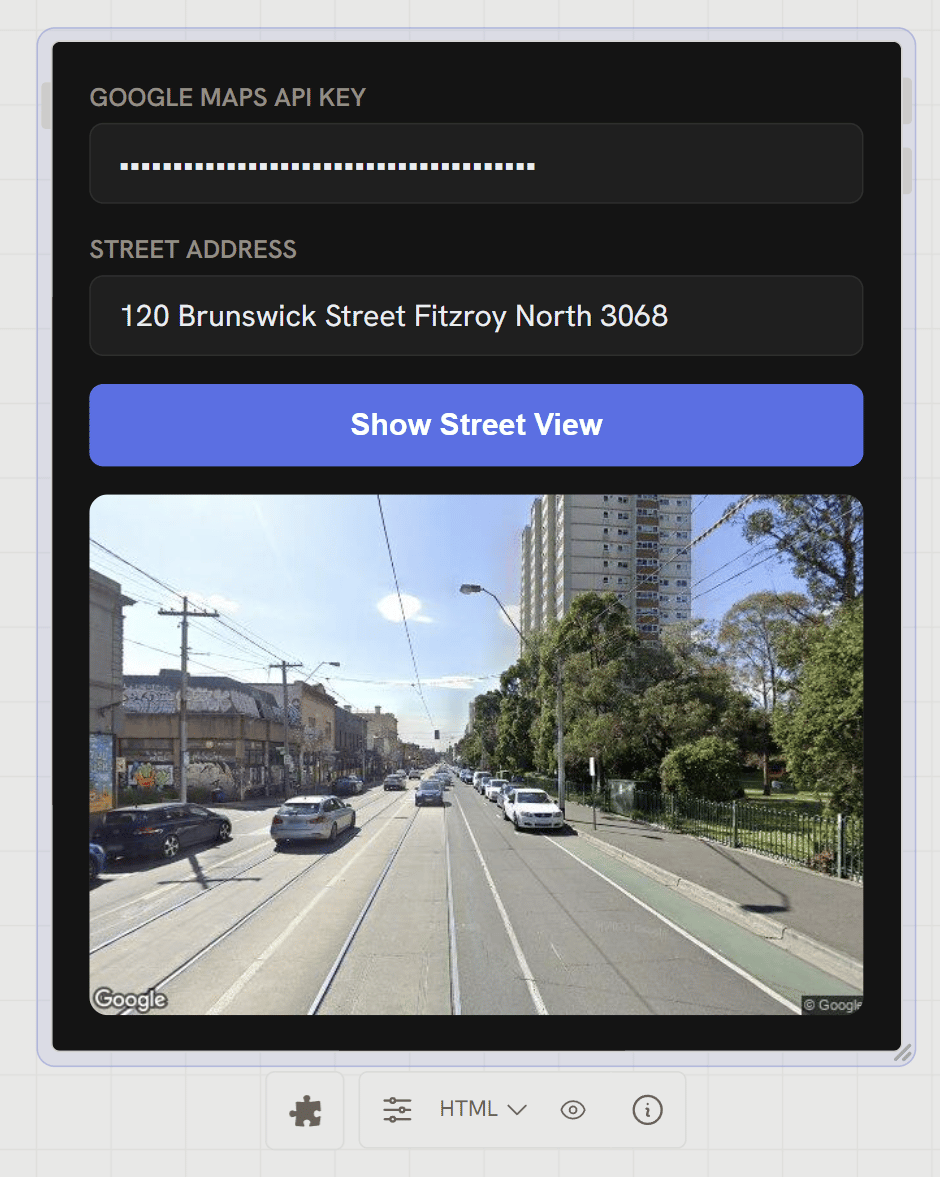
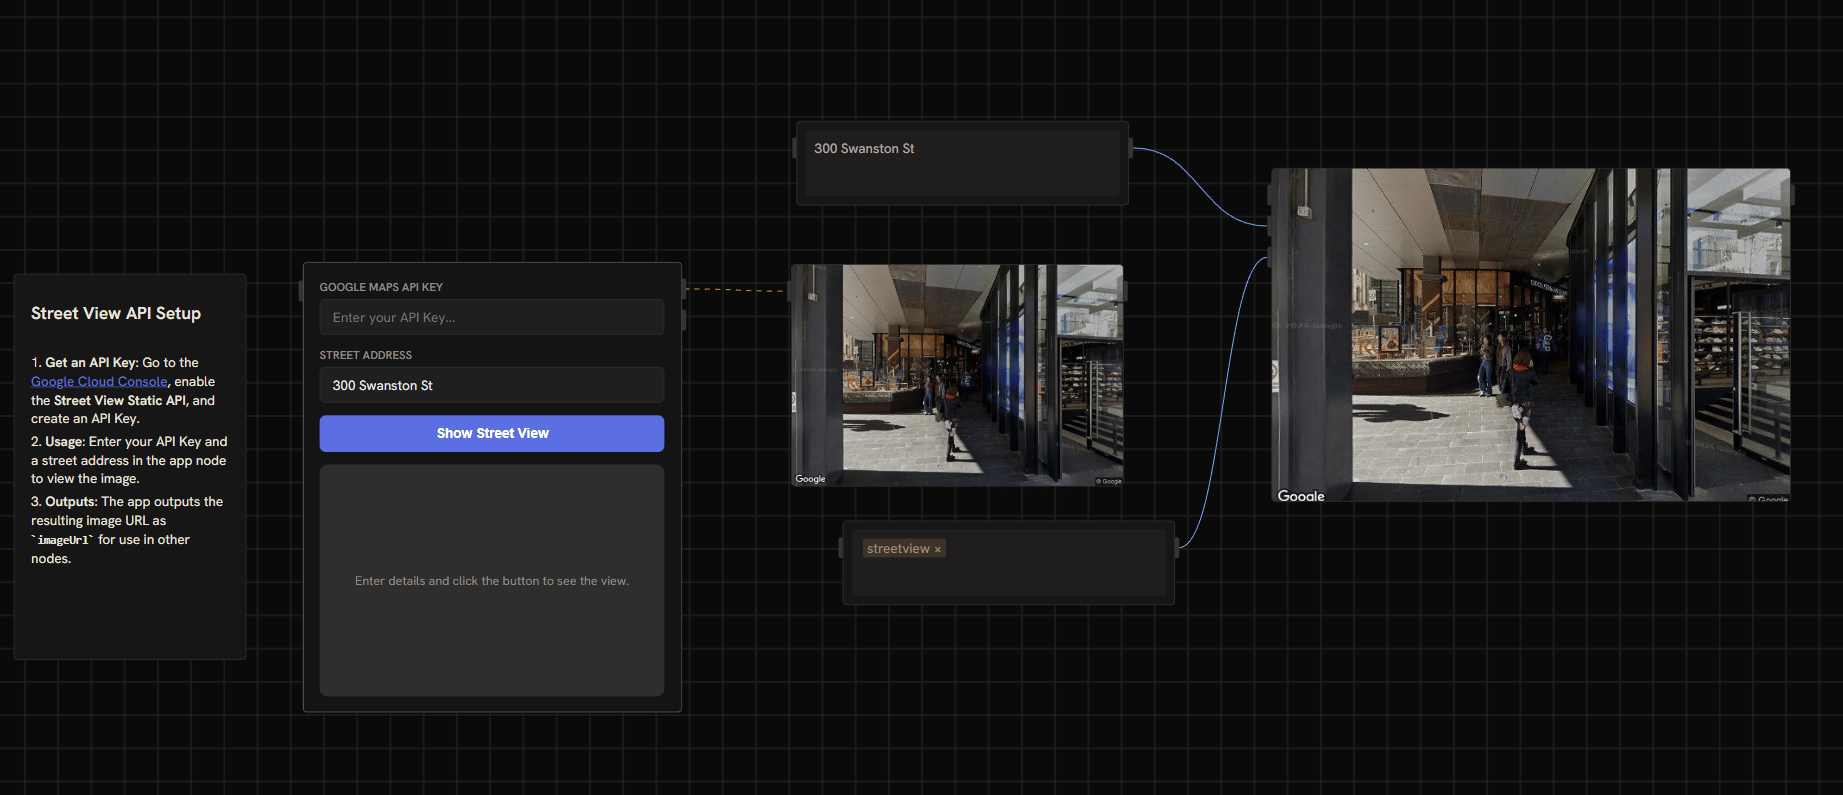
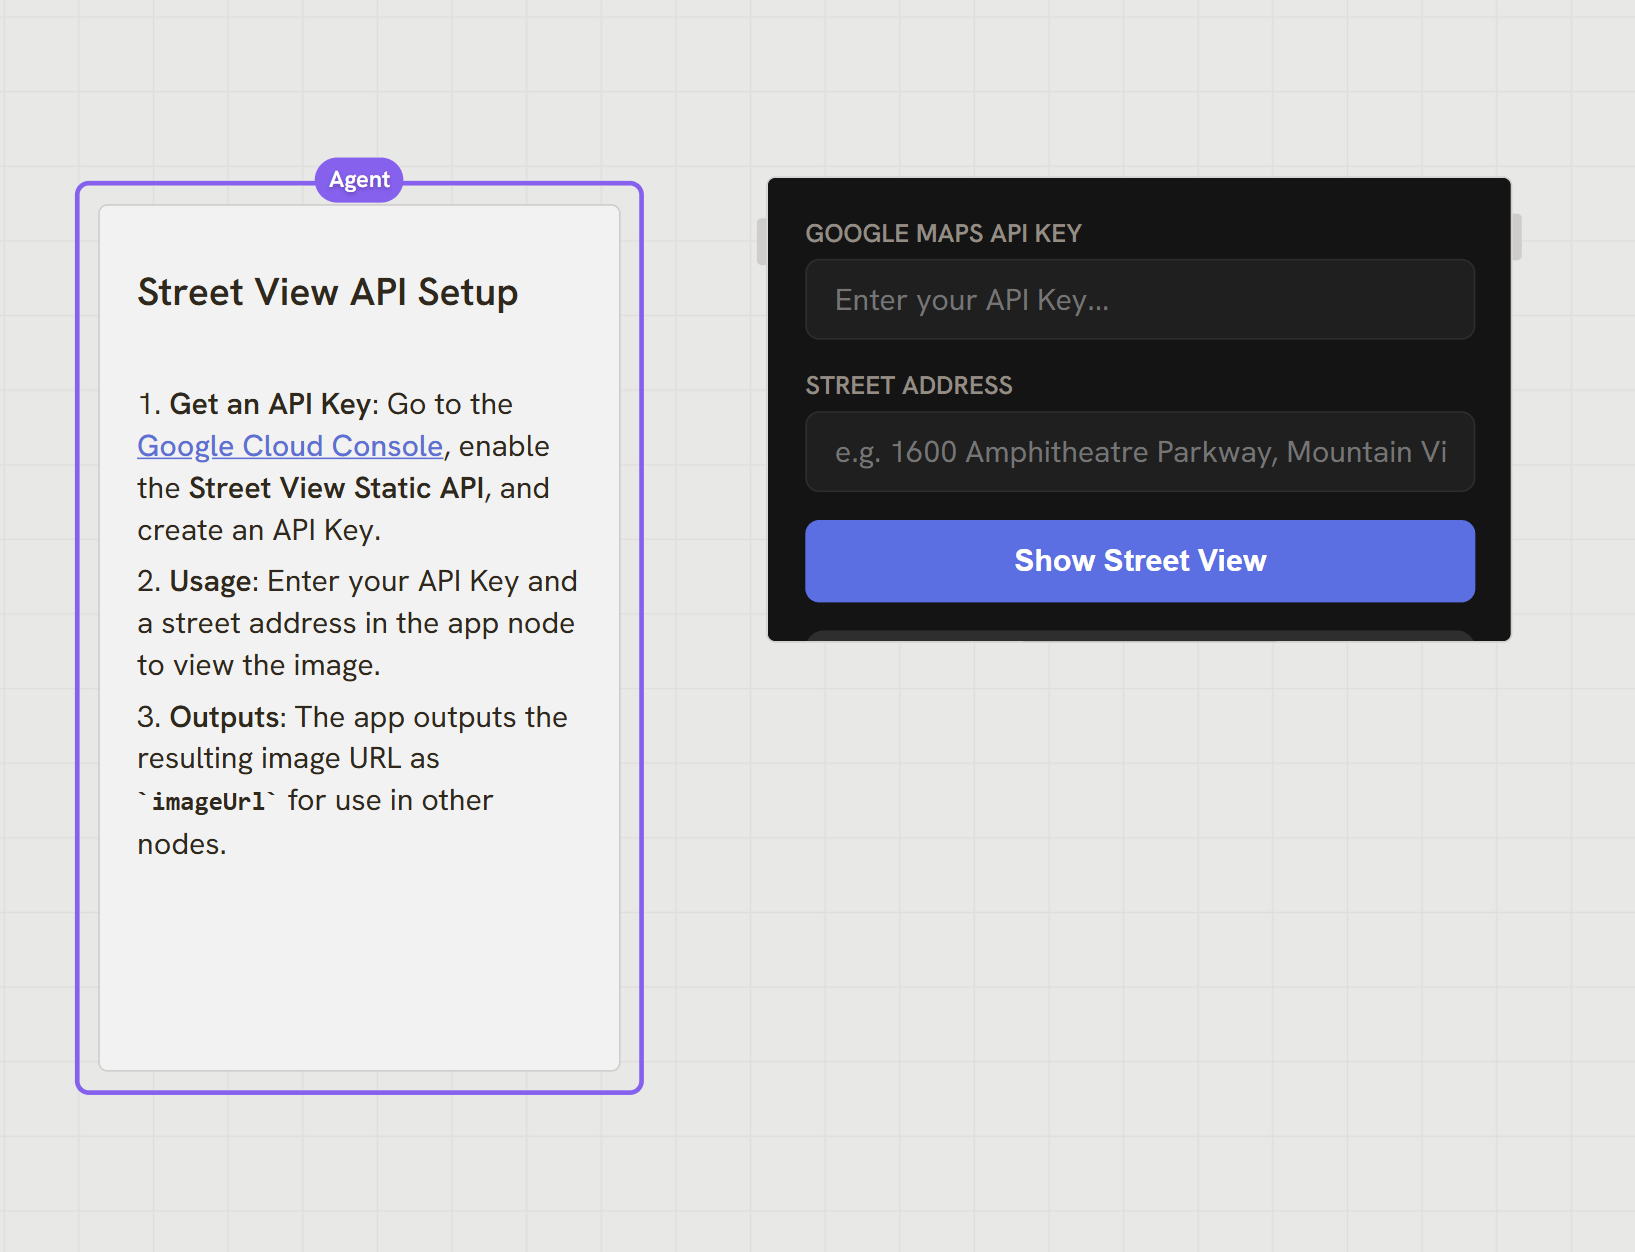 Paste your API key into the component, enter an address, and you should see a Streetview image appear:
 ## 3. Render the image locally and remove the key from output
The first version returns an image URL with the API key embedded, bad. Update the component so it fetches the image and renders it as base64:
```text theme={null}
Our Streetview node outputs a URL to the Streetview image and this
includes our API key. We don't want that. Update this node to render
the image to a canvas and return the base64 data instead.
```
## 3. Render the image locally and remove the key from output
The first version returns an image URL with the API key embedded, bad. Update the component so it fetches the image and renders it as base64:
```text theme={null}
Our Streetview node outputs a URL to the Streetview image and this
includes our API key. We don't want that. Update this node to render
the image to a canvas and return the base64 data instead.
```
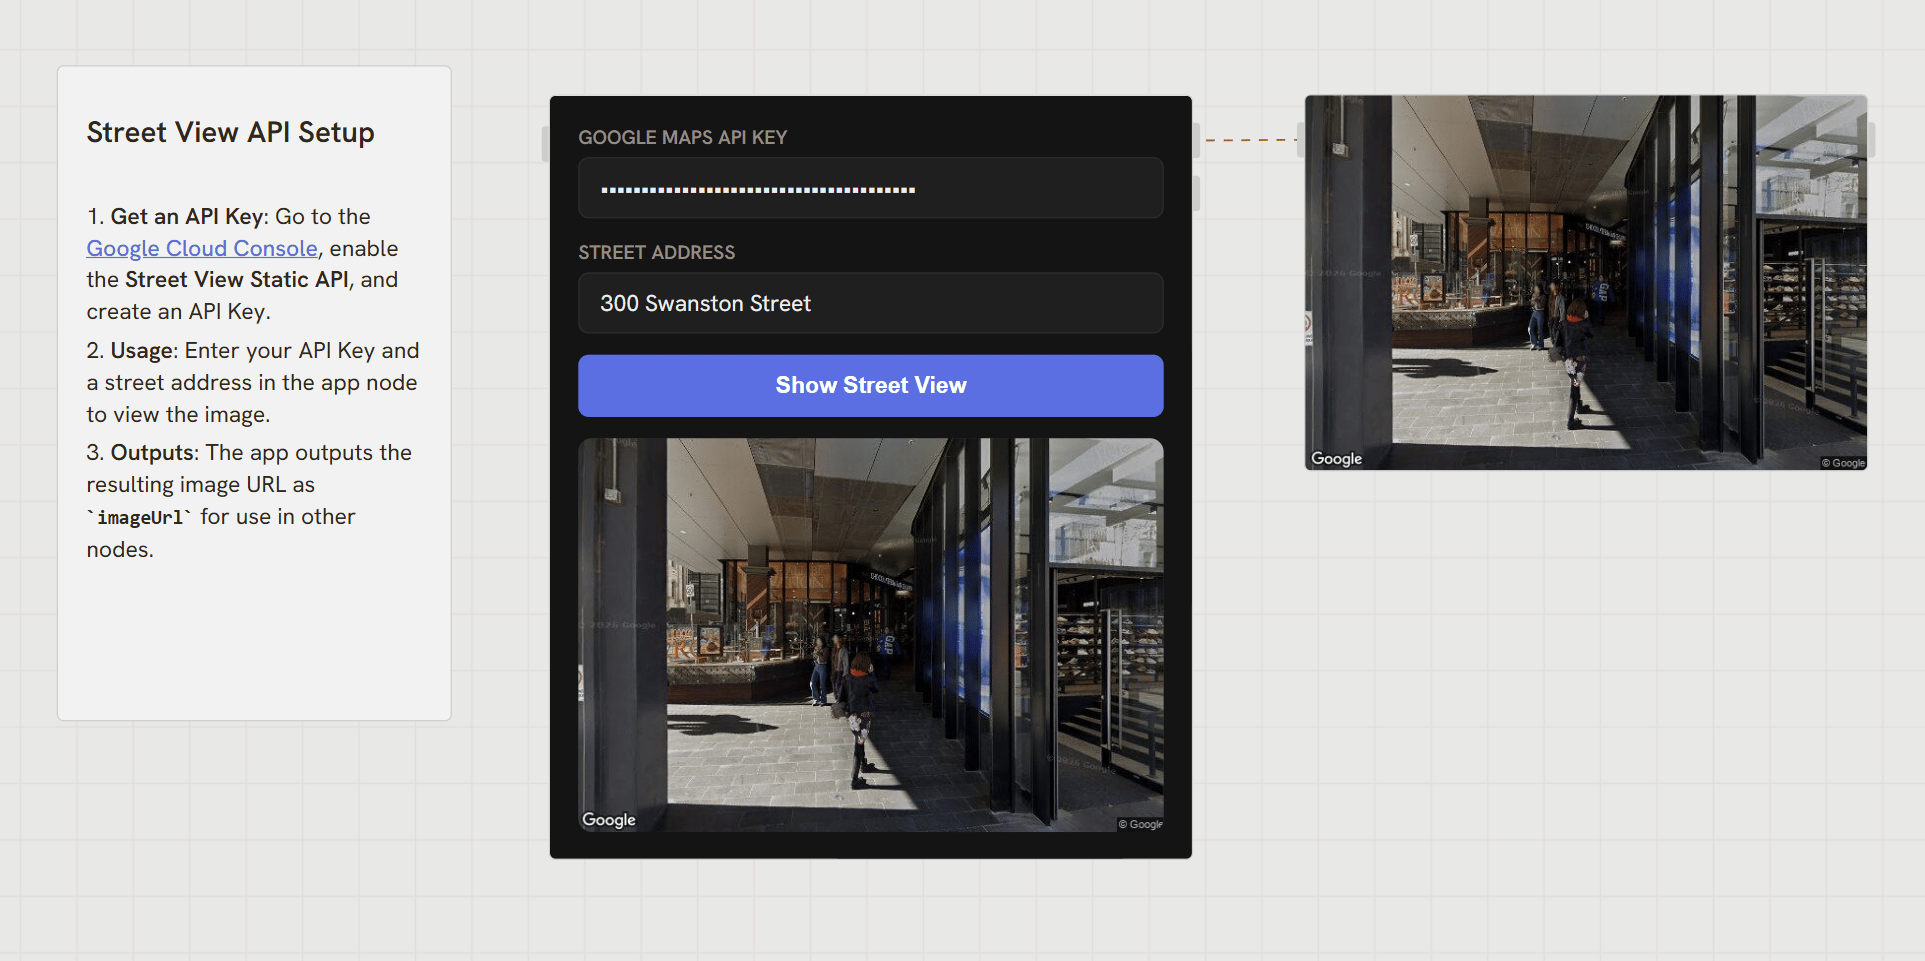 Runchat automatically uploads images returned by custom components to its own storage and replaces the data with a lightweight URL, so the component output stays small.
## 4. Make the address parametric
To use this in a parametric workflow, expose the address as an input:
```text theme={null}
Add an input parameter that lets us set the address.
```
Runchat automatically uploads images returned by custom components to its own storage and replaces the data with a lightweight URL, so the component output stays small.
## 4. Make the address parametric
To use this in a parametric workflow, expose the address as an input:
```text theme={null}
Add an input parameter that lets us set the address.
```
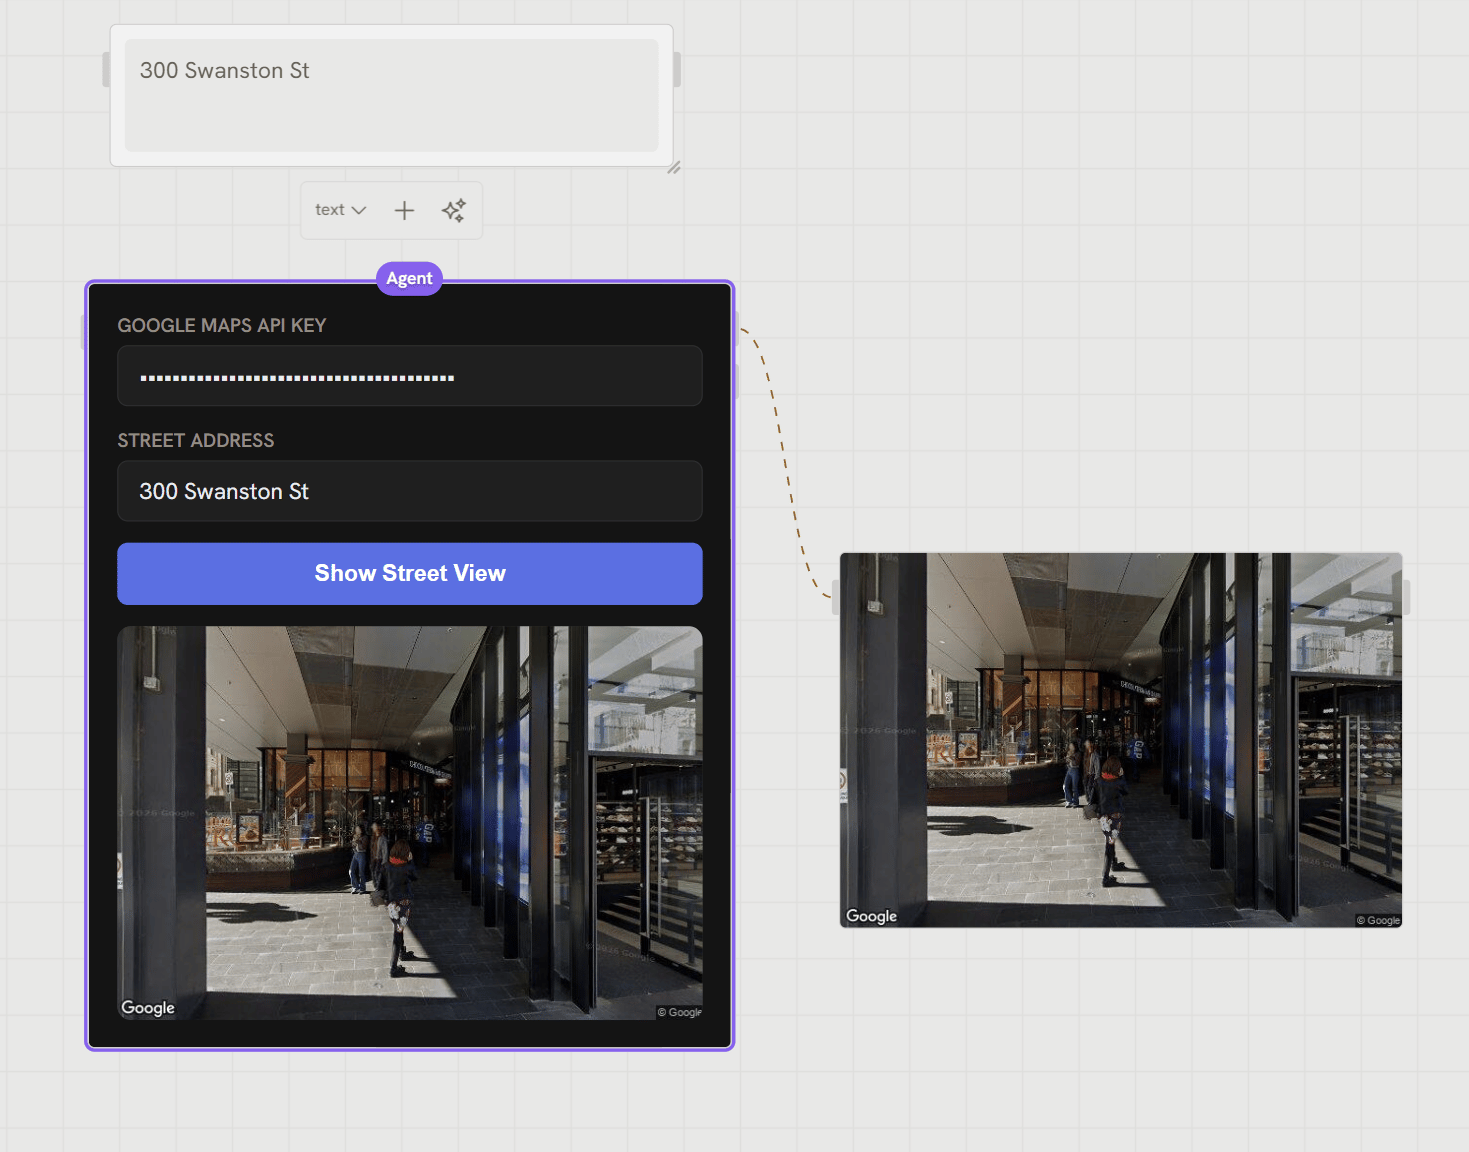 The agent will either add a real input parameter or use a template-string reference (the `@` syntax). Either works.
## 5. Convert to JavaScript for tools and Grasshopper
Custom HTML components run in your browser. That's fine for the editor, but if you want to use this as a tool with an agent, or run the workflow from Grasshopper, you need a server-side version.
```text theme={null}
Re-make this component as JavaScript that runs in our sandbox. We
should be able to fetch the Streetview image for a given address and
return it as a base64 string.
```
Connect your `streetview` credential to the new node by pressing `Tab` in any input field and selecting it from the credentials list. See [Credentials](/concepts/integrations/credentials) for the full credentials pattern.
The agent will either add a real input parameter or use a template-string reference (the `@` syntax). Either works.
## 5. Convert to JavaScript for tools and Grasshopper
Custom HTML components run in your browser. That's fine for the editor, but if you want to use this as a tool with an agent, or run the workflow from Grasshopper, you need a server-side version.
```text theme={null}
Re-make this component as JavaScript that runs in our sandbox. We
should be able to fetch the Streetview image for a given address and
return it as a base64 string.
```
Connect your `streetview` credential to the new node by pressing `Tab` in any input field and selecting it from the credentials list. See [Credentials](/concepts/integrations/credentials) for the full credentials pattern.
 ## 6. Process multiple addresses
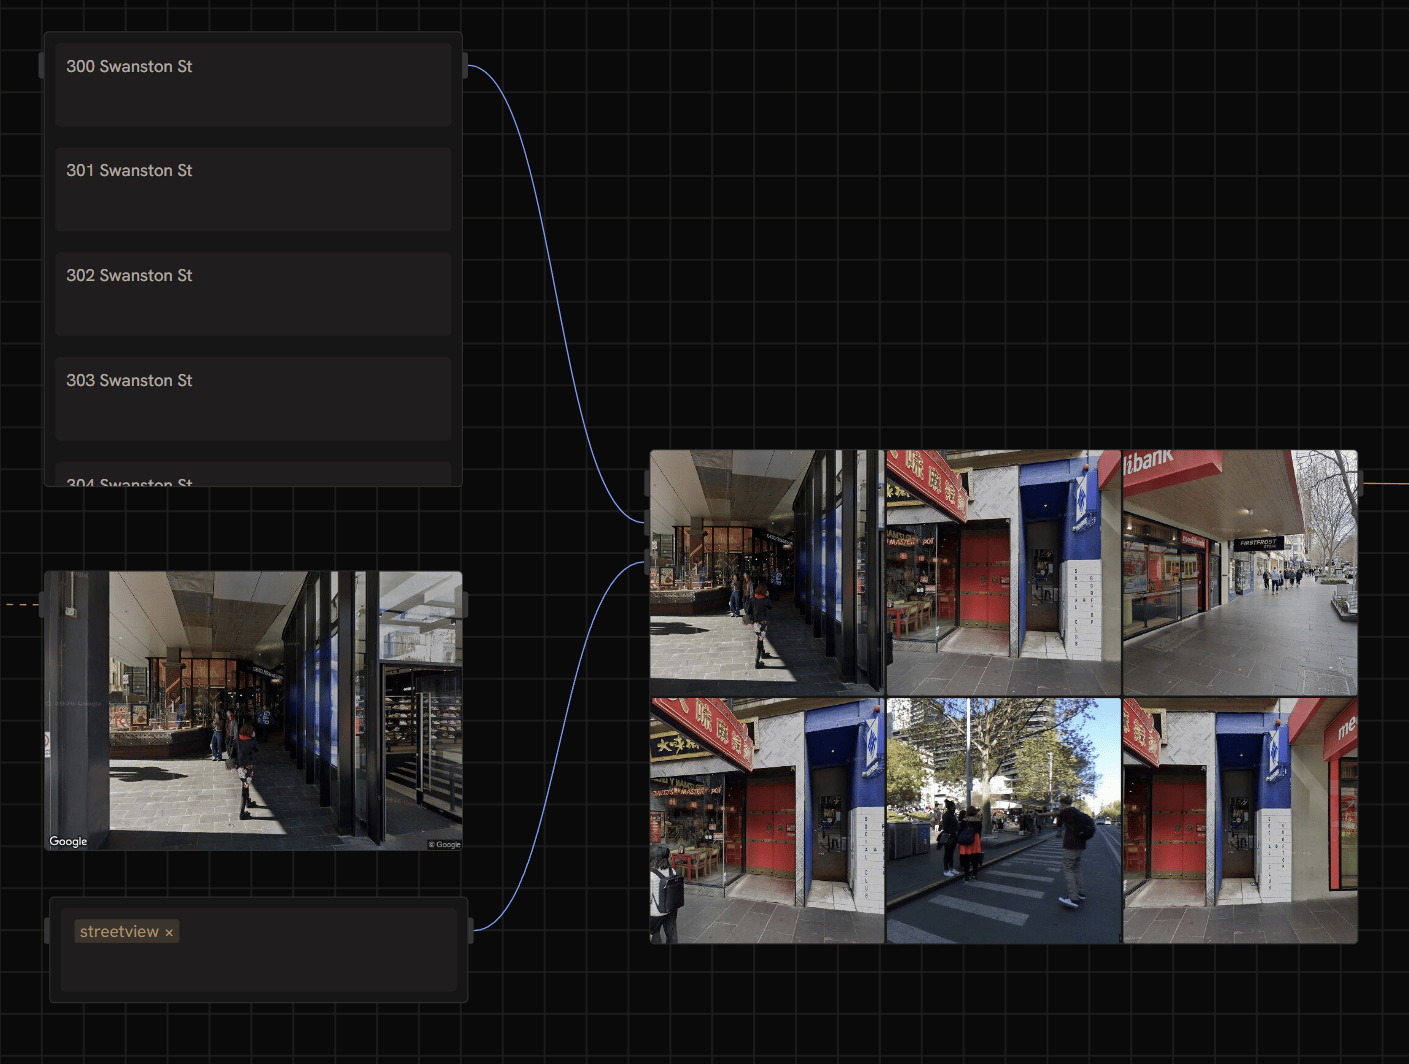
Connect a list of addresses to the JavaScript component to fetch a Streetview image for each:
## 6. Process multiple addresses
Connect a list of addresses to the JavaScript component to fetch a Streetview image for each:
 ## 7. Analyse images with an agent
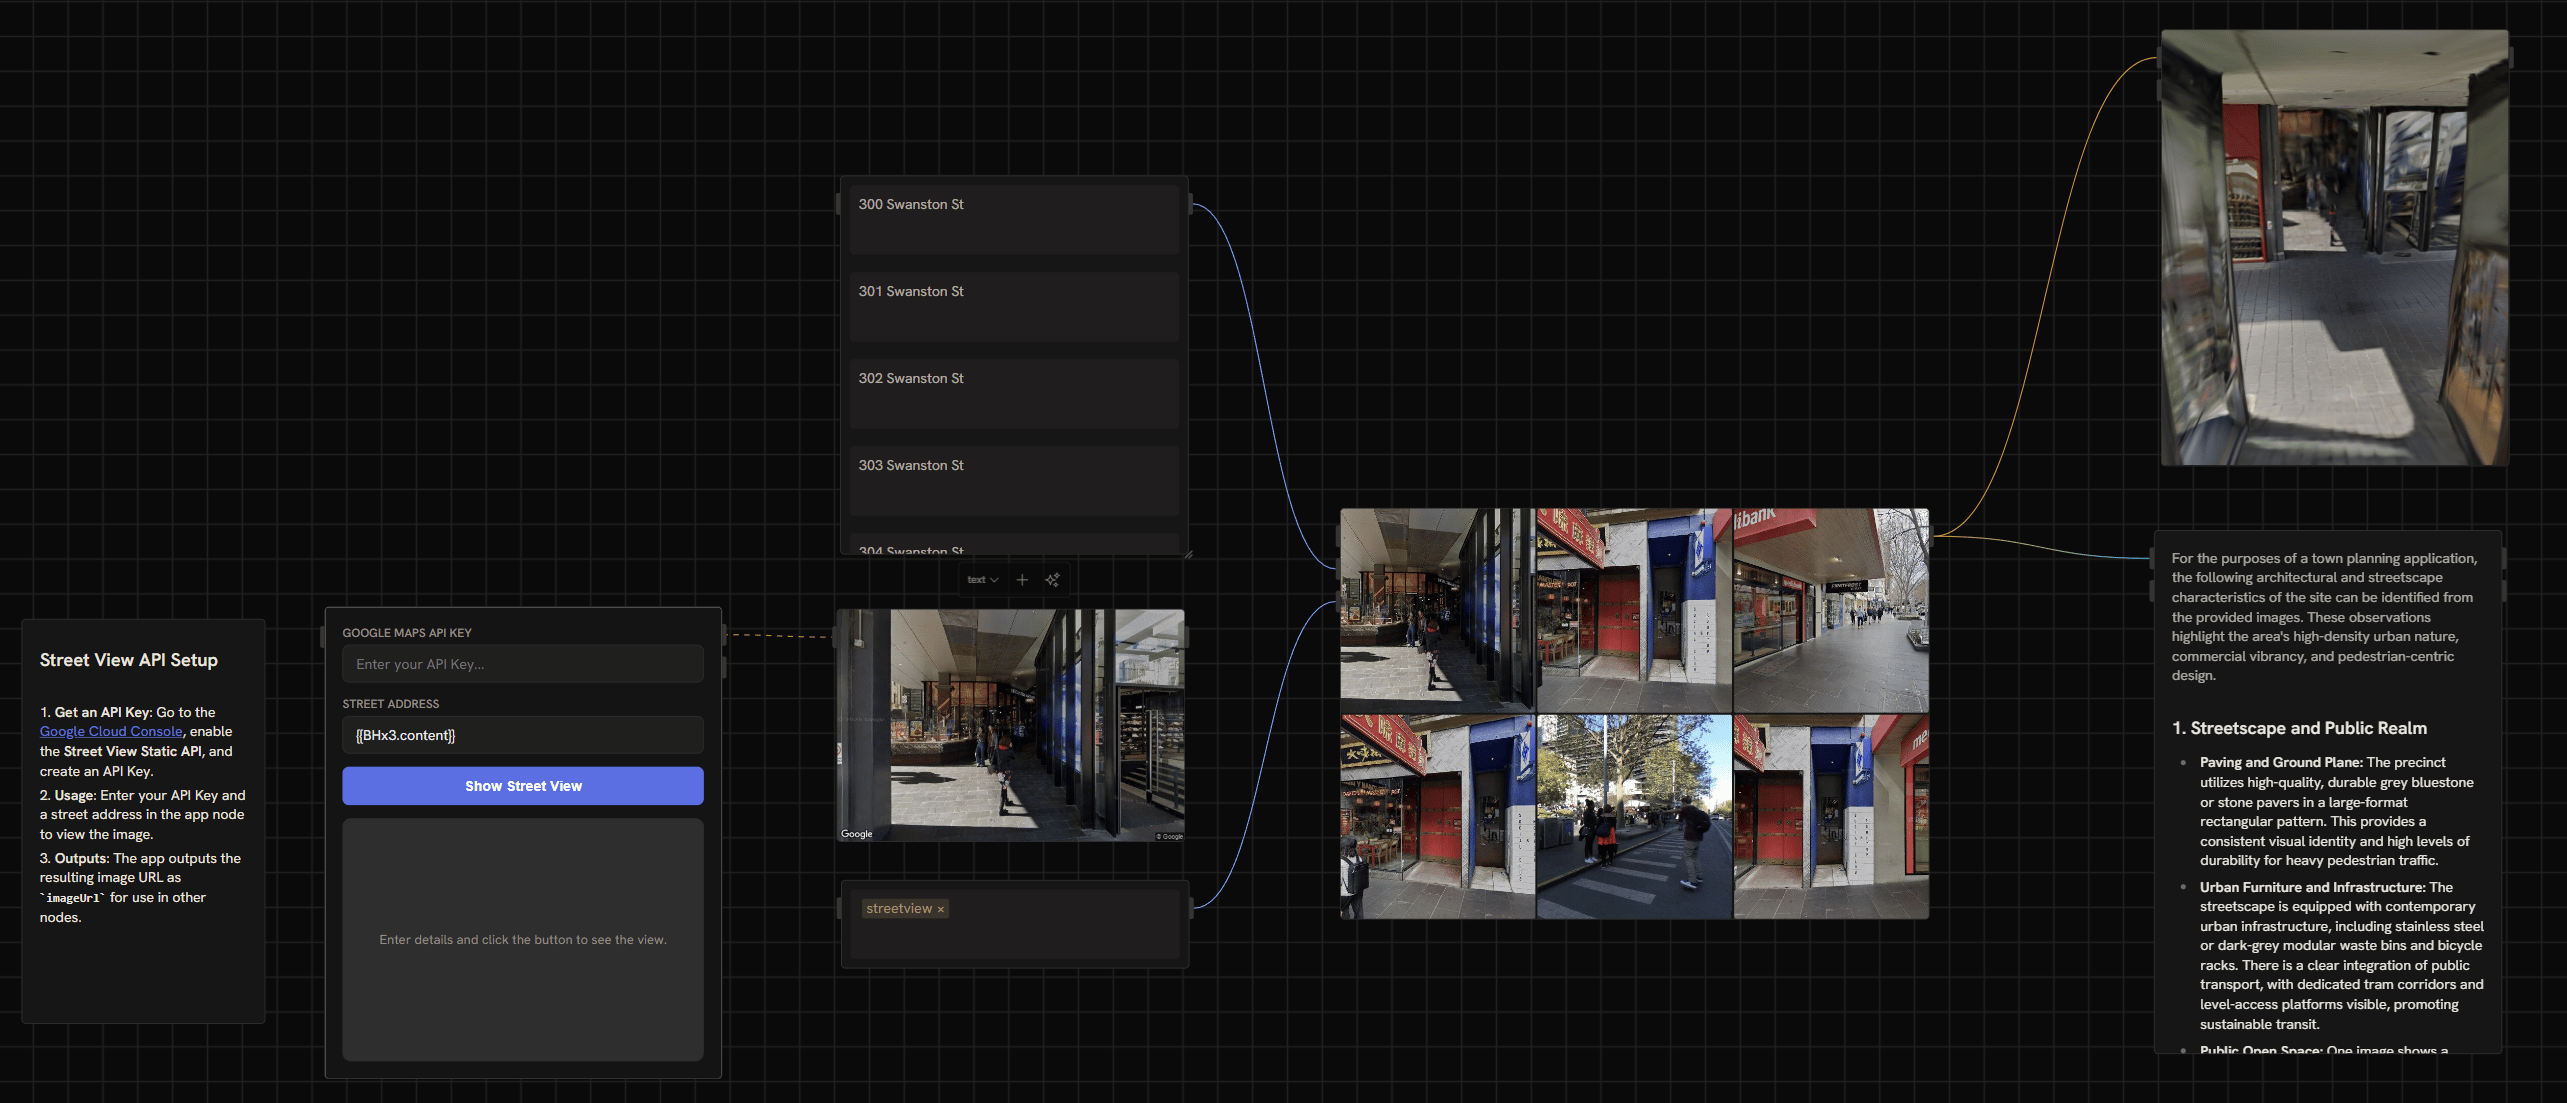
Connect the Streetview output to an [Agent](/node-reference/nodes/agent) node. Give it a prompt for whatever analysis you need, quantities and summaries of street planting, setbacks, heritage features, building typologies:
## 7. Analyse images with an agent
Connect the Streetview output to an [Agent](/node-reference/nodes/agent) node. Give it a prompt for whatever analysis you need, quantities and summaries of street planting, setbacks, heritage features, building typologies:
 ## 8. Use Streetview as a Rhino viewport background
For modelling against site context, use the agent to write a Python script that sets a Streetview image as a Rhino viewport background. In the Runchat plugin in Rhino, prompt:
```text theme={null}
Create a Python script that sets a given image as the background of a
specified Rhino viewport. Create a simple UI that lets us pick the
viewport after running the script.
```
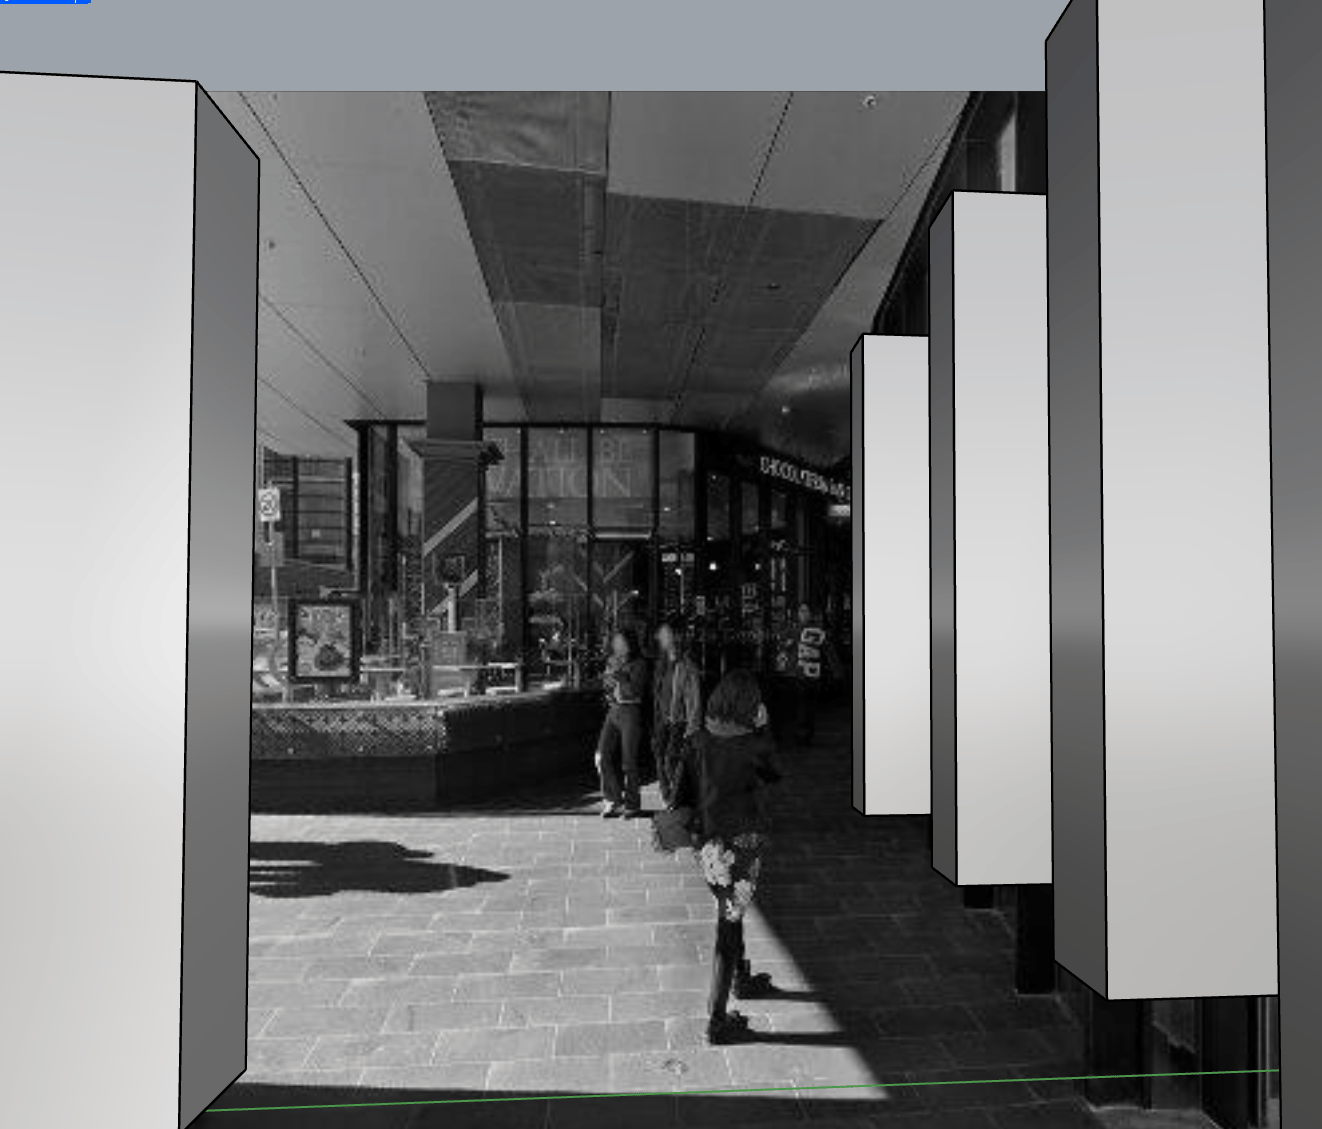
If you're using a fast model you may need to fix a few bugs. Use Opus to short-cut. Once it works, you can perspective-match to the image for modelling context:
## 8. Use Streetview as a Rhino viewport background
For modelling against site context, use the agent to write a Python script that sets a Streetview image as a Rhino viewport background. In the Runchat plugin in Rhino, prompt:
```text theme={null}
Create a Python script that sets a given image as the background of a
specified Rhino viewport. Create a simple UI that lets us pick the
viewport after running the script.
```
If you're using a fast model you may need to fix a few bugs. Use Opus to short-cut. Once it works, you can perspective-match to the image for modelling context:
 ## 9. Generate 3D environments with Marble
For immersive site mockups, generate a 3D model from a Streetview image using Marble Mini:
1. Add a **Marble Mini** node to the canvas
2. Connect a Streetview image
3. Optionally write a prompt to guide content not visible in the input
4. Run. Takes about 30 seconds for a Gaussian splat
## 9. Generate 3D environments with Marble
For immersive site mockups, generate a 3D model from a Streetview image using Marble Mini:
1. Add a **Marble Mini** node to the canvas
2. Connect a Streetview image
3. Optionally write a prompt to guide content not visible in the input
4. Run. Takes about 30 seconds for a Gaussian splat
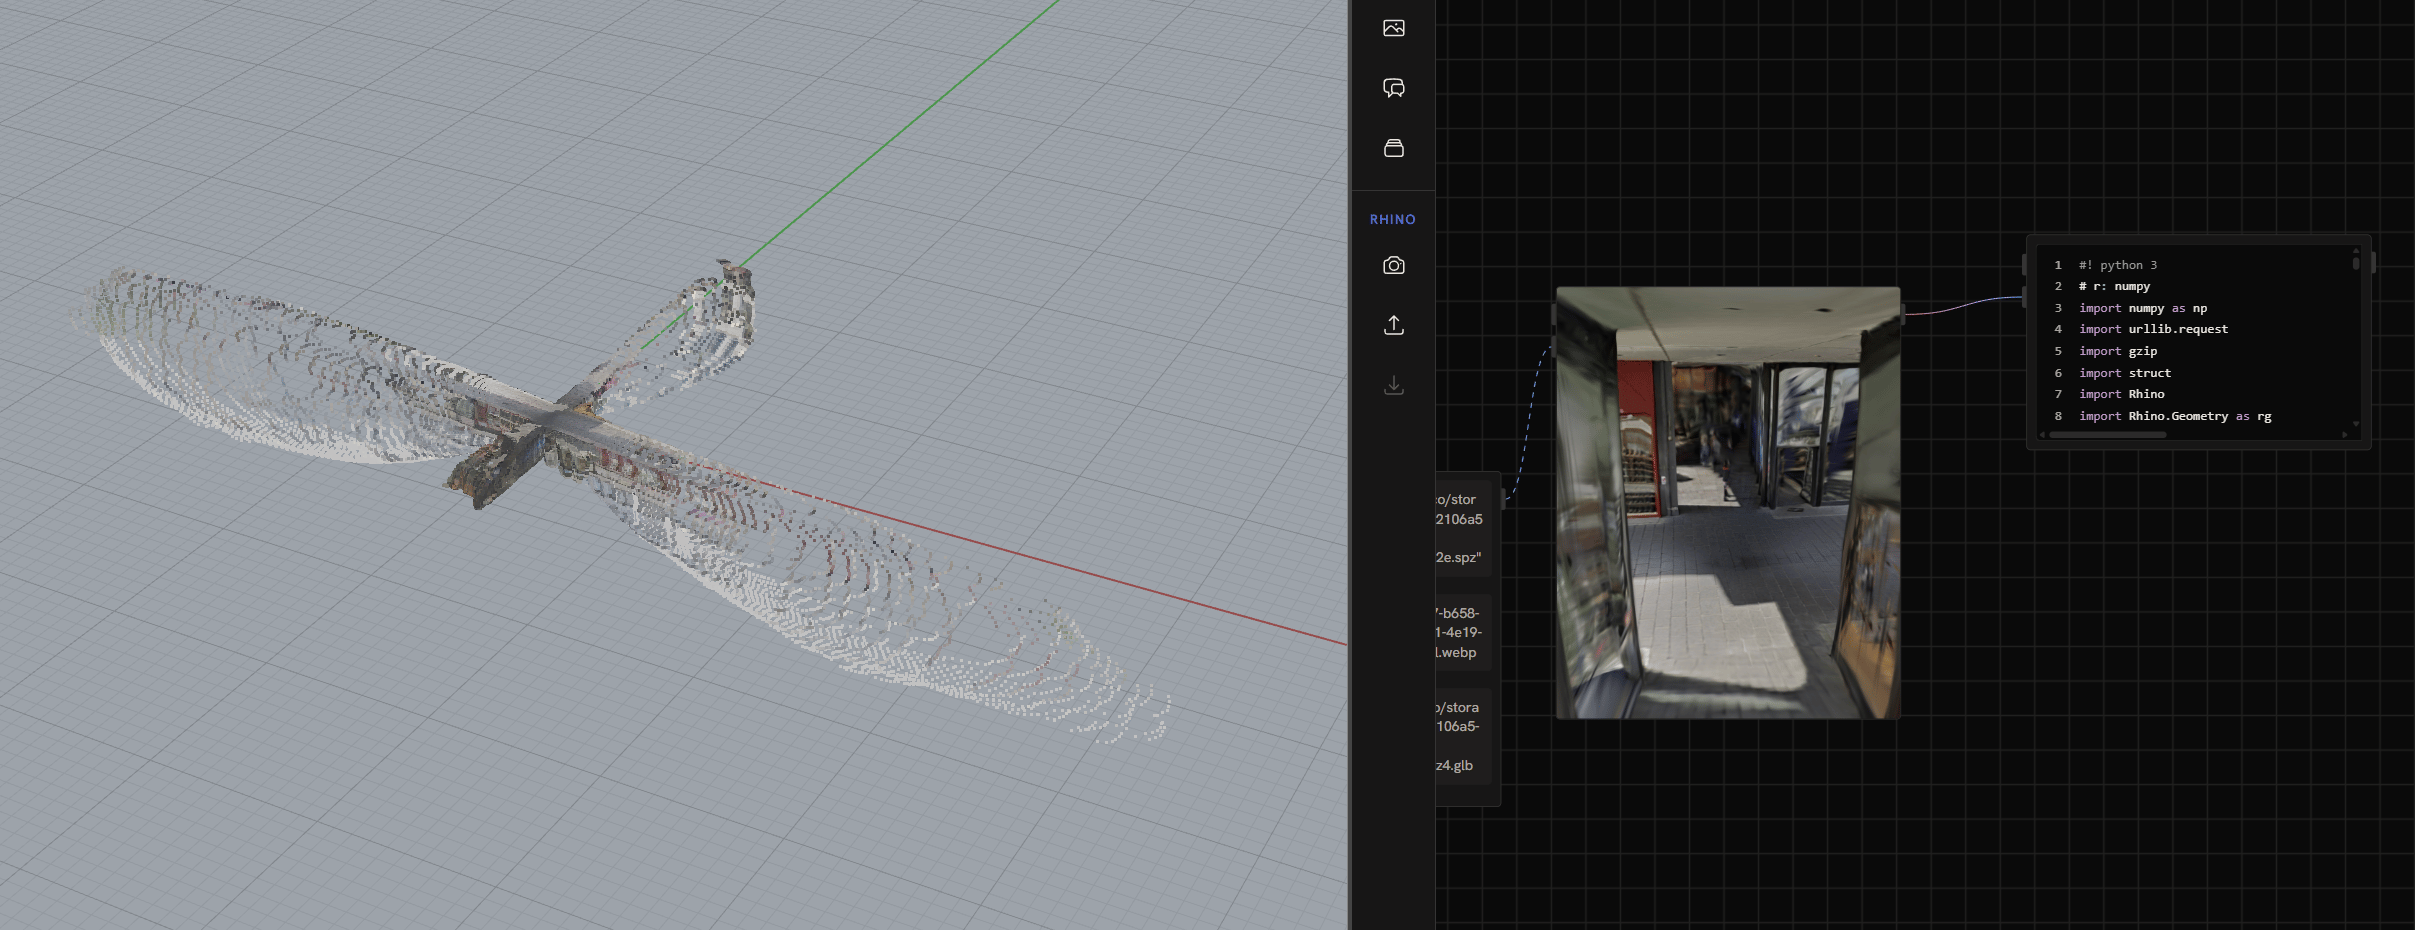 Rhino doesn't have a native splat viewer, but you can vibe-code a Python script that converts the `.spz` format to a coloured pointcloud:
1. Grab the [SPZ format spec markdown](https://github.com/nianticlabs/spz/blob/main/README.md)
2. Prompt Opus: `We have a splat file in spz format. Write a Python script that converts this to a coloured pointcloud we can render in Rhino. The reference spec is below.` (paste the spec)
3. Iterate on errors until it works
Rhino doesn't have a native splat viewer, but you can vibe-code a Python script that converts the `.spz` format to a coloured pointcloud:
1. Grab the [SPZ format spec markdown](https://github.com/nianticlabs/spz/blob/main/README.md)
2. Prompt Opus: `We have a splat file in spz format. Write a Python script that converts this to a coloured pointcloud we can render in Rhino. The reference spec is below.` (paste the spec)
3. Iterate on errors until it works
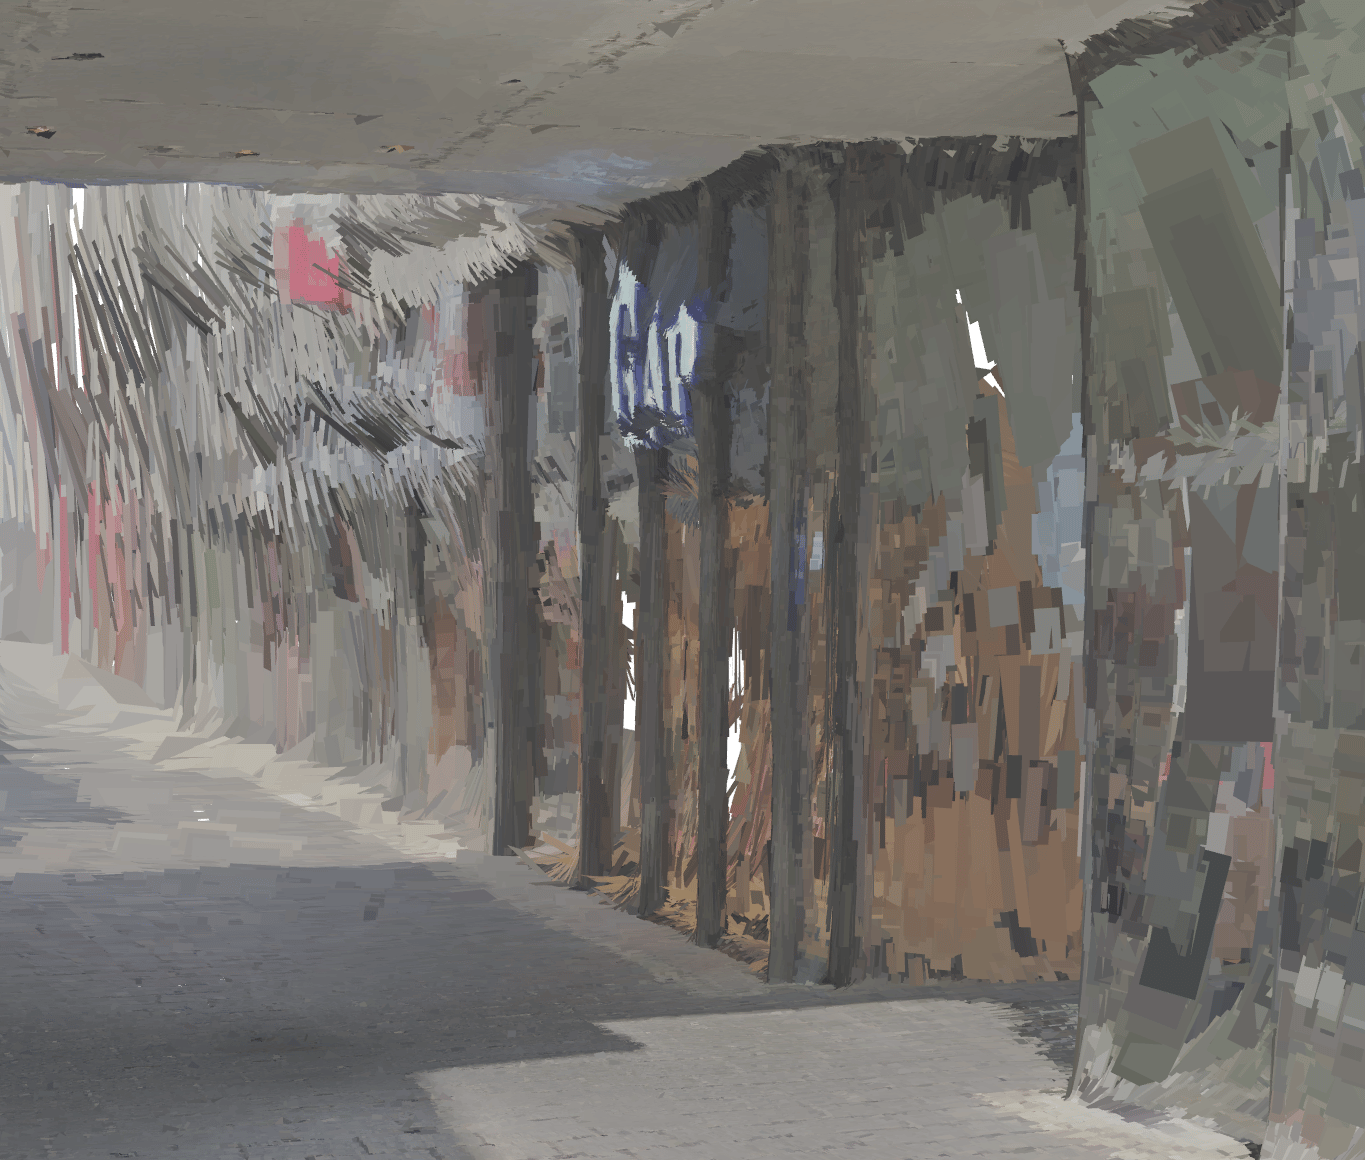
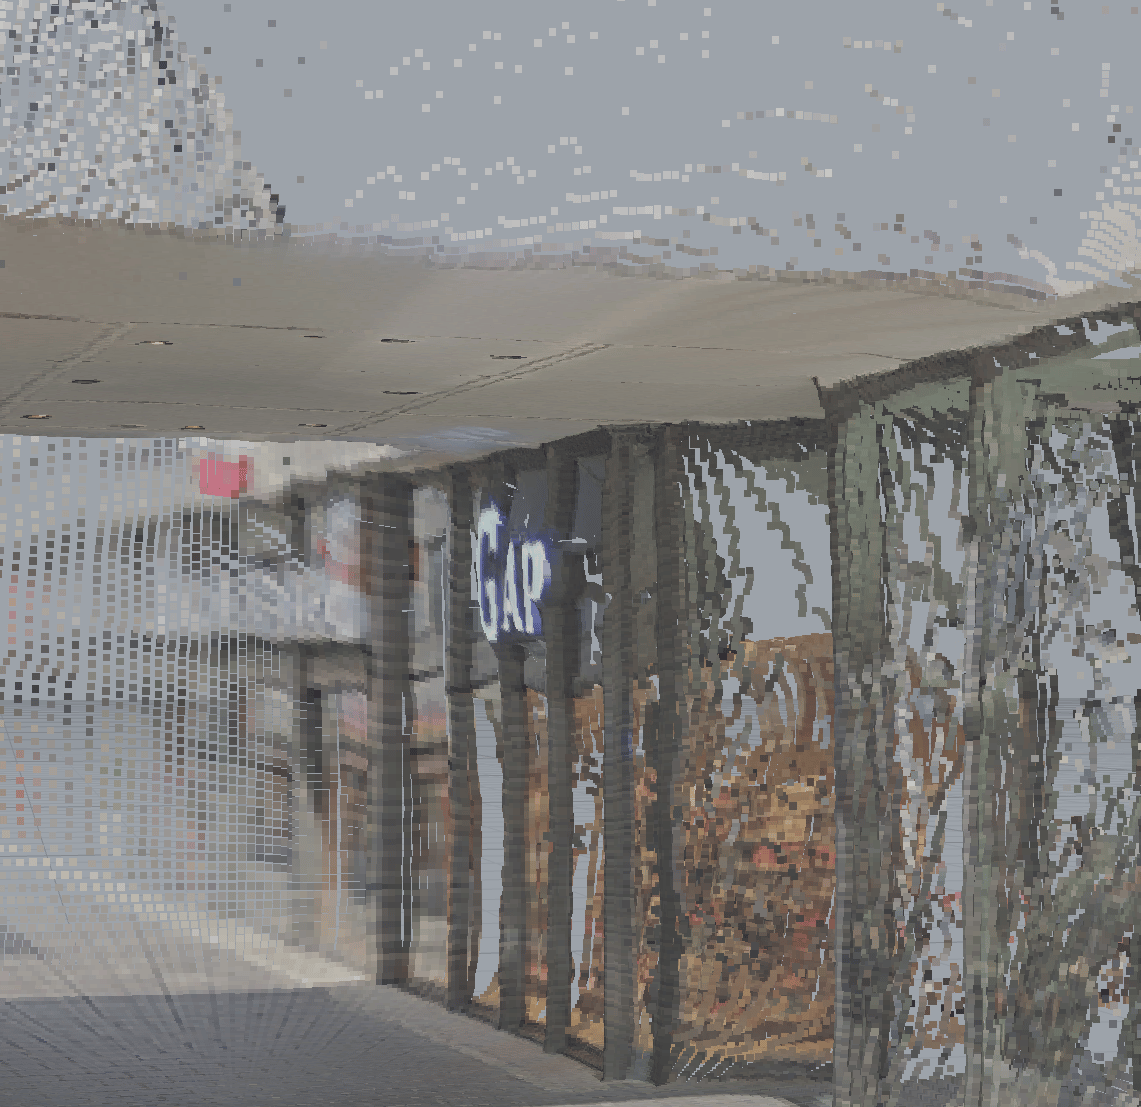 You can prompt Opus further to render quads aligned to the splats:
 ## 10. Build a Places API component
Streetview is one source. Places is another, useful for "what's near this site?" queries (parks, schools, transit stops).
1. Enable [Places API](https://console.cloud.google.com/marketplace/product/google/places.googleapis.com) in Google Cloud
2. Add `https://places.googleapis.com` to the allowed origins of your `streetview` secret (or create a new secret)
3. Grab the [Nearby Search docs](https://developers.google.com/maps/documentation/places/web-service/nearby-search) and click "Copy page to markdown"
4. Prompt the chat agent: `Create a JavaScript component that fetches place information using the Places API:` (paste the markdown)
## 10. Build a Places API component
Streetview is one source. Places is another, useful for "what's near this site?" queries (parks, schools, transit stops).
1. Enable [Places API](https://console.cloud.google.com/marketplace/product/google/places.googleapis.com) in Google Cloud
2. Add `https://places.googleapis.com` to the allowed origins of your `streetview` secret (or create a new secret)
3. Grab the [Nearby Search docs](https://developers.google.com/maps/documentation/places/web-service/nearby-search) and click "Copy page to markdown"
4. Prompt the chat agent: `Create a JavaScript component that fetches place information using the Places API:` (paste the markdown)
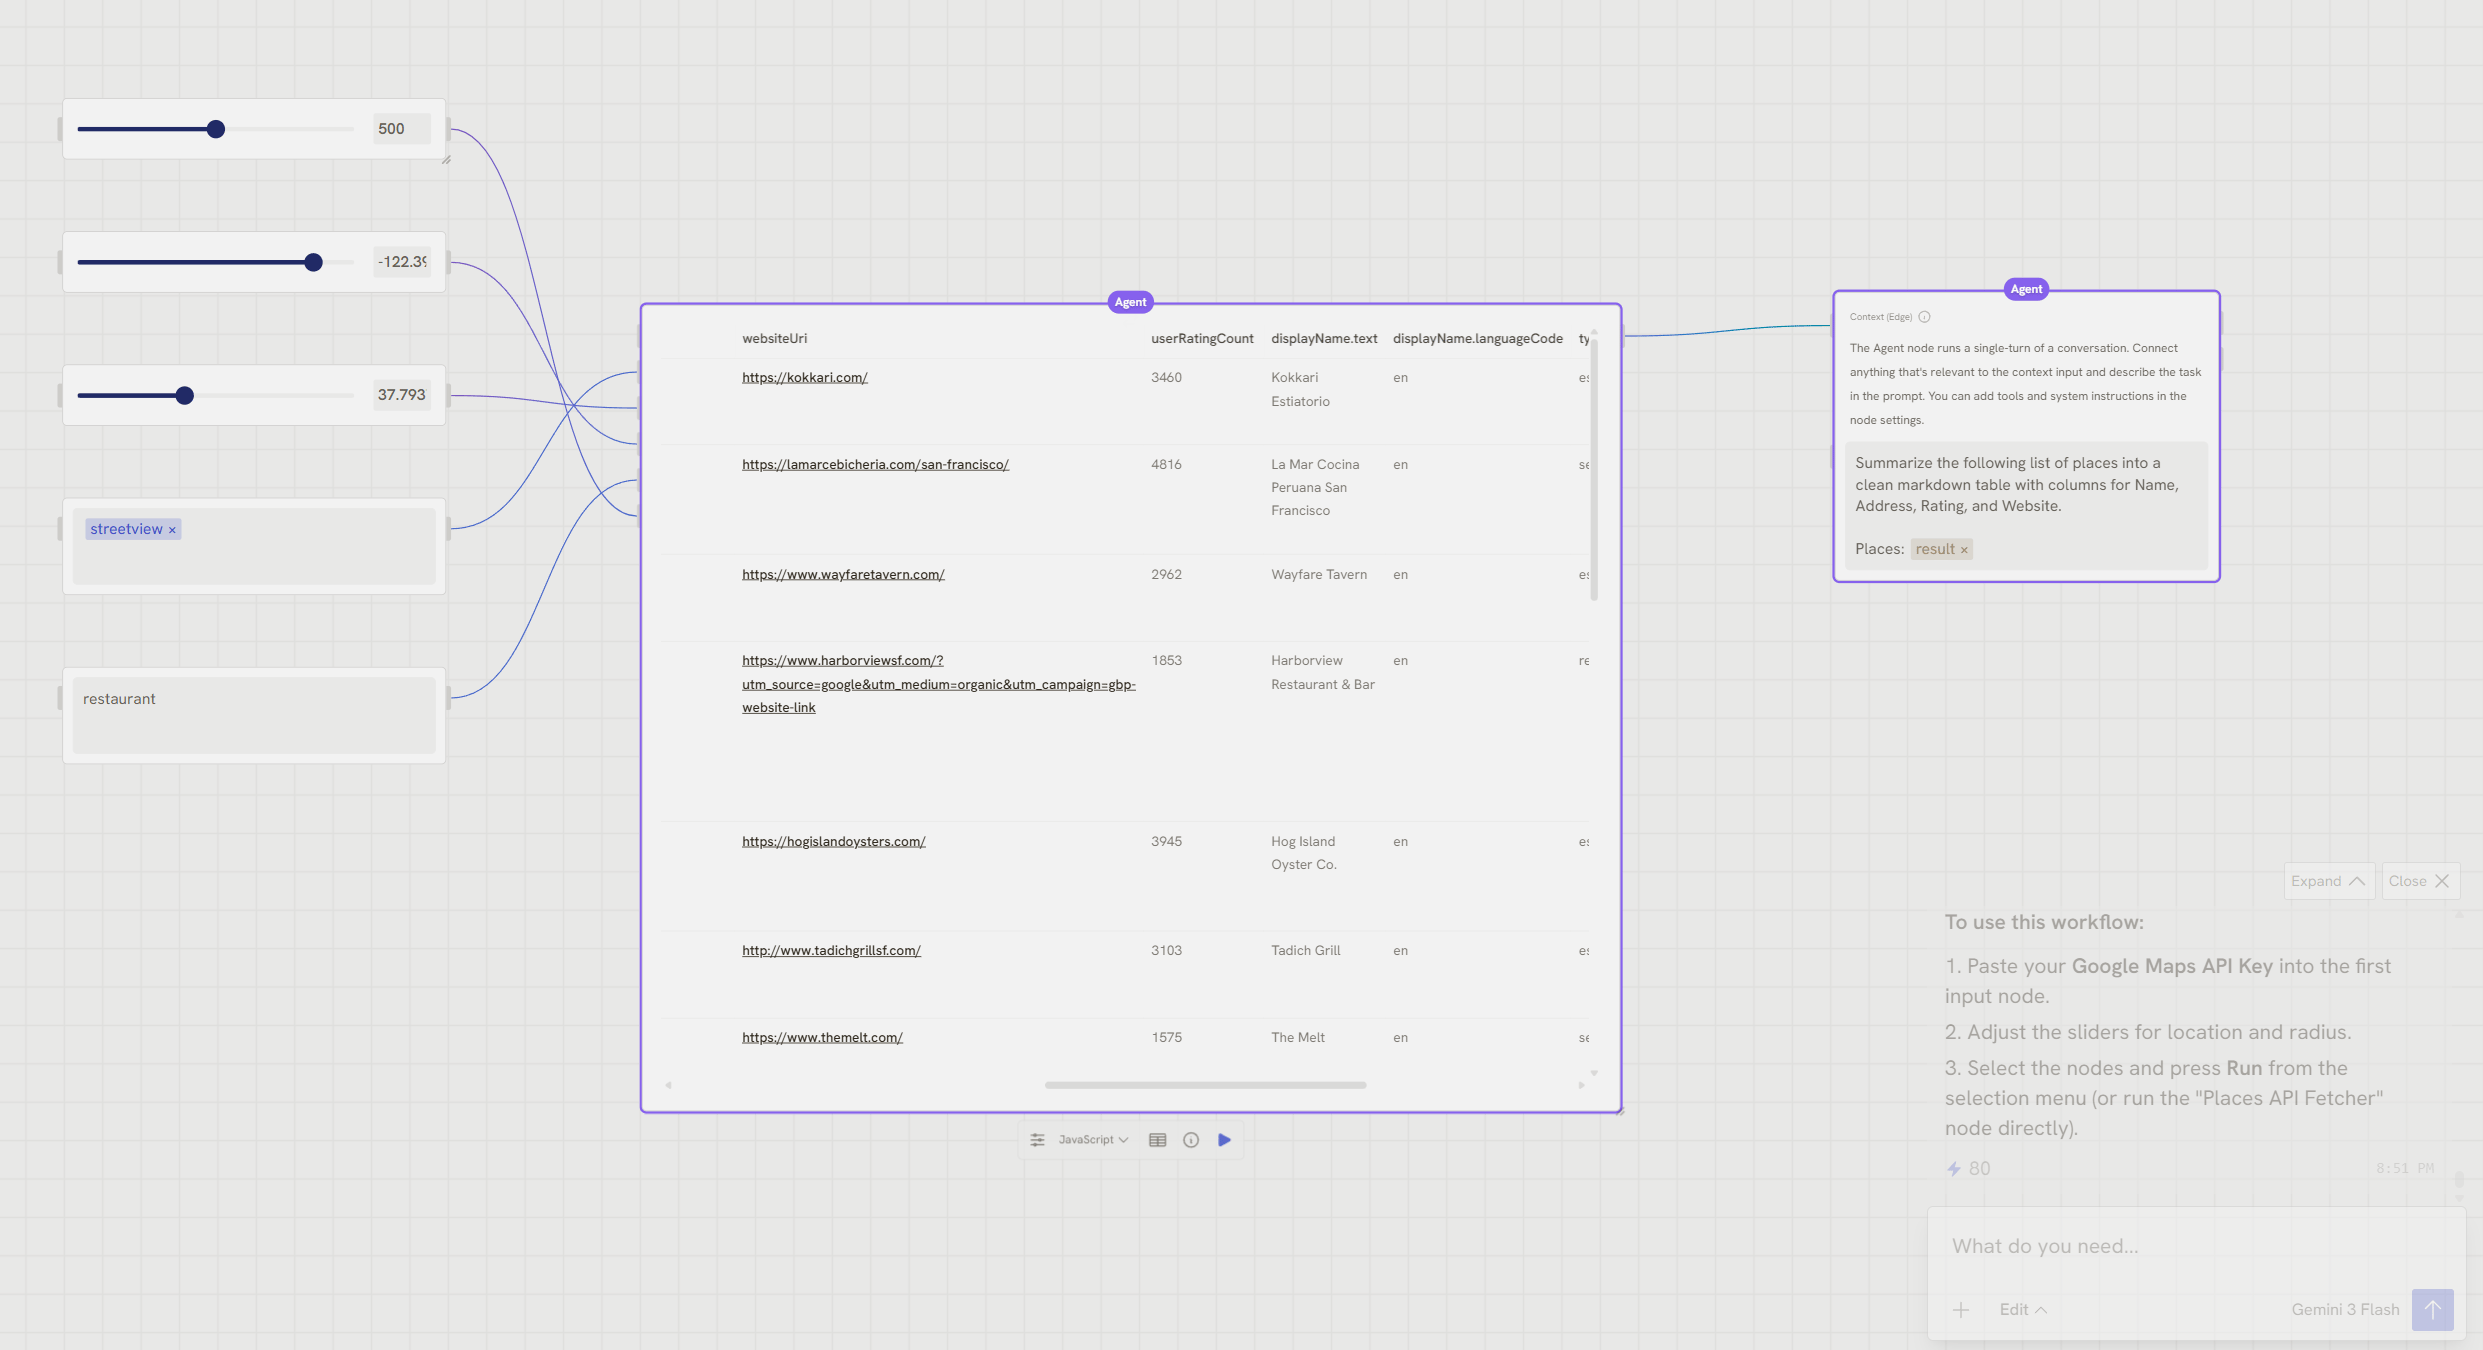 Connect the Places output to an Agent node for a summary:
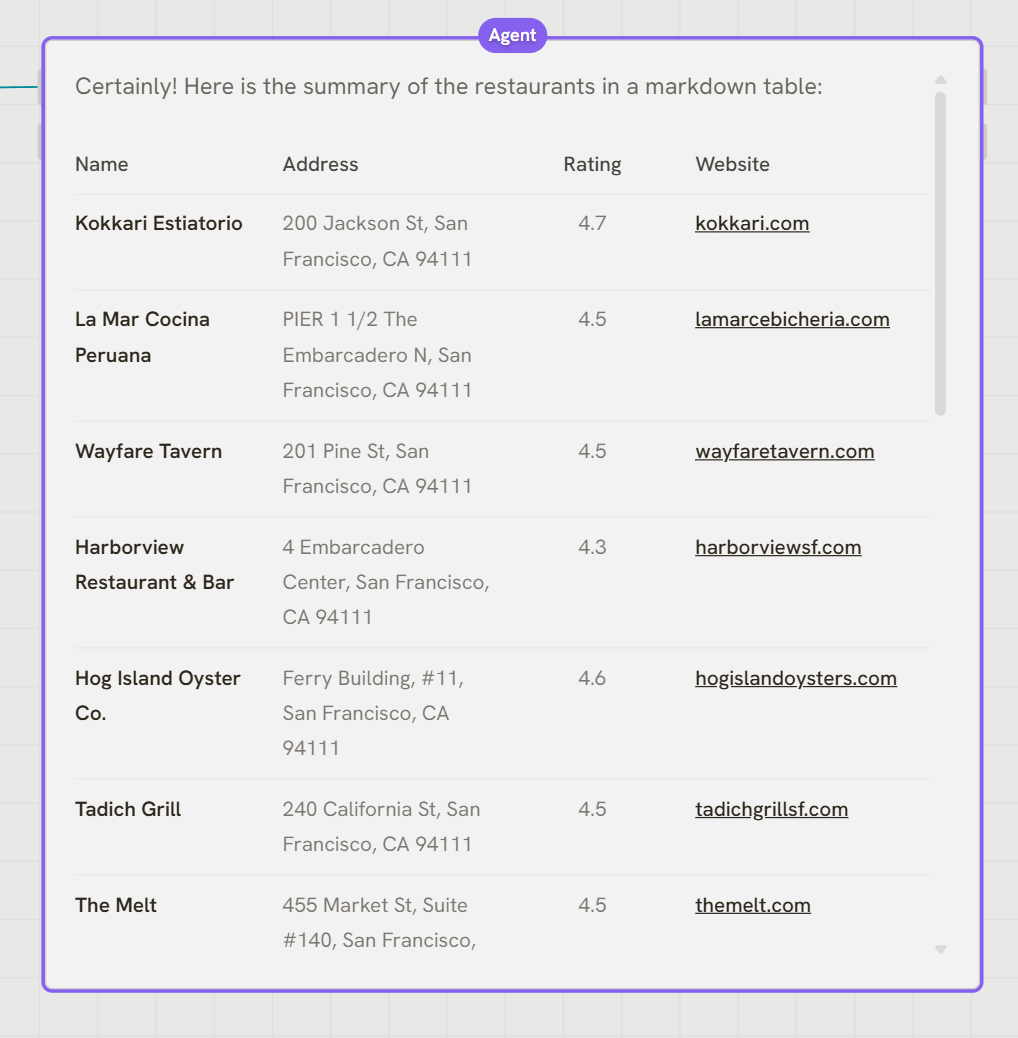 Watch out when the Agent uses both referenced parameters AND edge inputs. In
the table-summary example, the table can end up injected into the prompt AND
the message context. Double-coverage. Pick one.
## 11. Publish the Places workflow as a tool
The real power is letting an agent call this directly. To do that, publish your Places workflow as a [Tool](/concepts/publishing/libraries) that exposes address, type, and radius as parameters while keeping the API key internal.
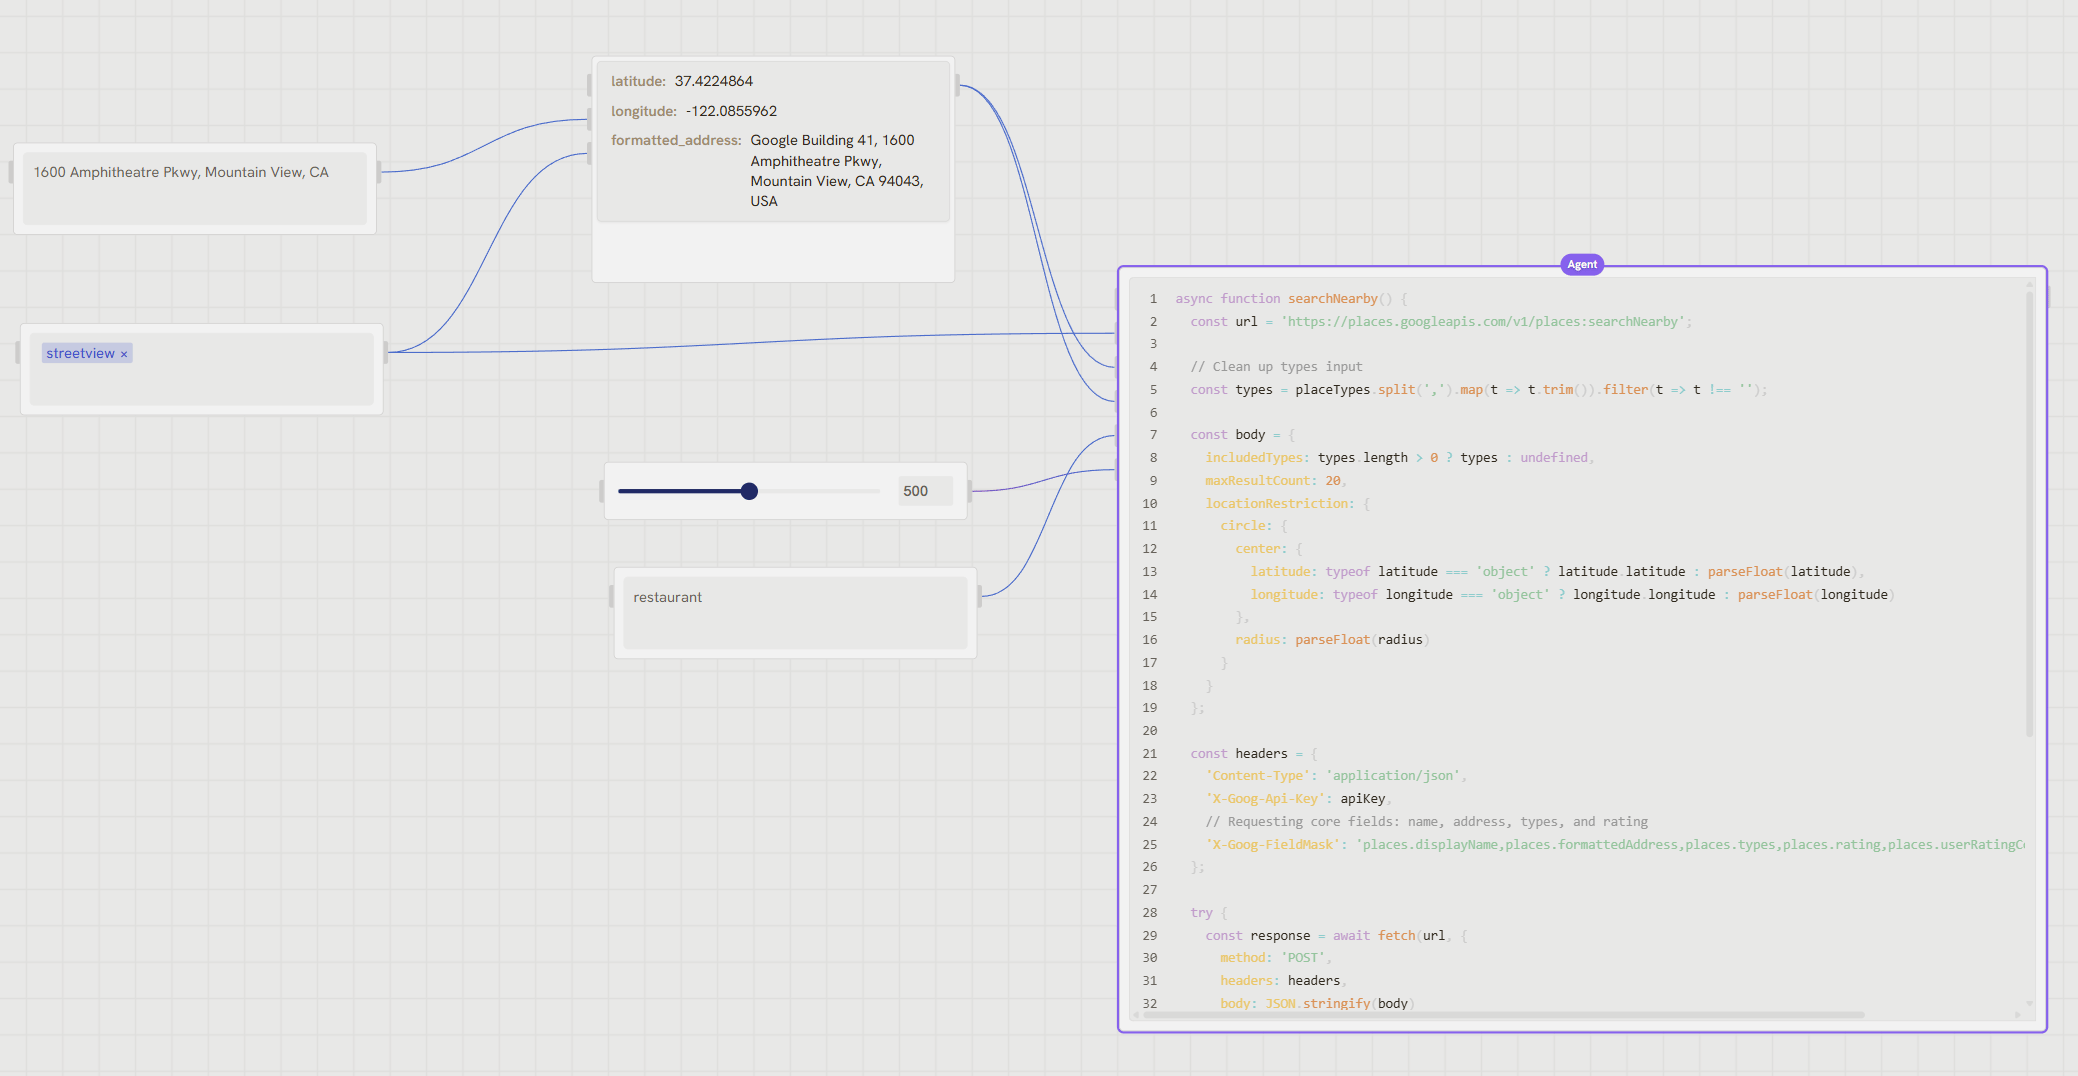
First, add a Geocoding step so users can pass an address instead of lat/long. Enable [Geocoding API](https://console.cloud.google.com/marketplace/product/google/geocoding-backend.googleapis.com), then ask the agent to add a node that converts addresses to coordinates:
Watch out when the Agent uses both referenced parameters AND edge inputs. In
the table-summary example, the table can end up injected into the prompt AND
the message context. Double-coverage. Pick one.
## 11. Publish the Places workflow as a tool
The real power is letting an agent call this directly. To do that, publish your Places workflow as a [Tool](/concepts/publishing/libraries) that exposes address, type, and radius as parameters while keeping the API key internal.
First, add a Geocoding step so users can pass an address instead of lat/long. Enable [Geocoding API](https://console.cloud.google.com/marketplace/product/google/geocoding-backend.googleapis.com), then ask the agent to add a node that converts addresses to coordinates:
 Then publish:
1. Expand the app preview by clicking your workflow's title (or the chevron beside it) in the top bar
2. Add the address, radius, and type on the **Inputs** side (with descriptions), and add the places table on the **Outputs** side (toggle sides from the toolbar)
3. Name the workflow in the top bar, then click **Publish** and add a strong description in the confirmation (the agent reads this to decide when to use it):
> *Fetches nearby place information using the Google Places API. Takes an address, radius and place type as input and returns place information as JSON.*
Then publish:
1. Expand the app preview by clicking your workflow's title (or the chevron beside it) in the top bar
2. Add the address, radius, and type on the **Inputs** side (with descriptions), and add the places table on the **Outputs** side (toggle sides from the toolbar)
3. Name the workflow in the top bar, then click **Publish** and add a strong description in the confirmation (the agent reads this to decide when to use it):
> *Fetches nearby place information using the Google Places API. Takes an address, radius and place type as input and returns place information as JSON.*
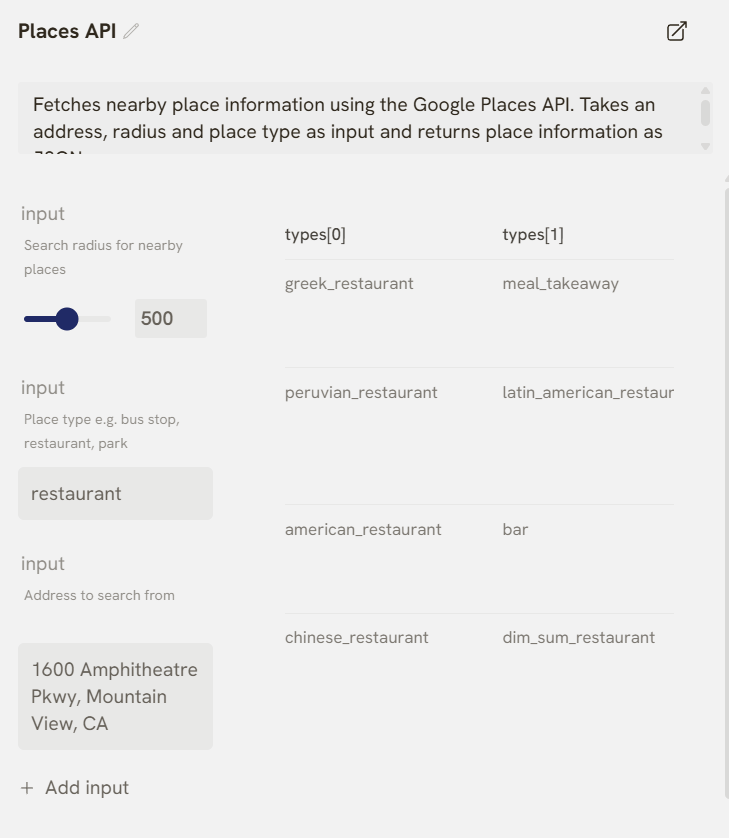 5. Click **Publish V1**
For more on publishing patterns, see [Tools, Apps, and Libraries](/concepts/publishing/libraries).
## 12. Add the tool to a library
For an agent to use your tool it has to be in an installed library:
1. Click **Workflows** in the editor drawer
2. Click **+** to create a new folder, name it `Google APIs`
3. Drag your Places workflow into the folder
4. Right-click the folder and choose **Add to Nodes**
5. Click **Publish V1**
For more on publishing patterns, see [Tools, Apps, and Libraries](/concepts/publishing/libraries).
## 12. Add the tool to a library
For an agent to use your tool it has to be in an installed library:
1. Click **Workflows** in the editor drawer
2. Click **+** to create a new folder, name it `Google APIs`
3. Drag your Places workflow into the folder
4. Right-click the folder and choose **Add to Nodes**
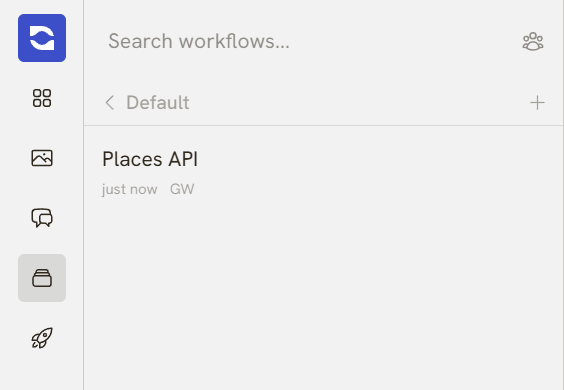 The folder turns blue. Tools inside it are now available to the chat agent and searchable in the node picker.
## 13. Use the tool in a chat
Create a new workflow (you can't use a tool inside its own workflow). Click **+** in the chat, **Tools**, select the Places tool. Now ask:
```text theme={null}
How many parks are near 429 Rae Street Fitzroy North VIC 3068?
```
The folder turns blue. Tools inside it are now available to the chat agent and searchable in the node picker.
## 13. Use the tool in a chat
Create a new workflow (you can't use a tool inside its own workflow). Click **+** in the chat, **Tools**, select the Places tool. Now ask:
```text theme={null}
How many parks are near 429 Rae Street Fitzroy North VIC 3068?
```
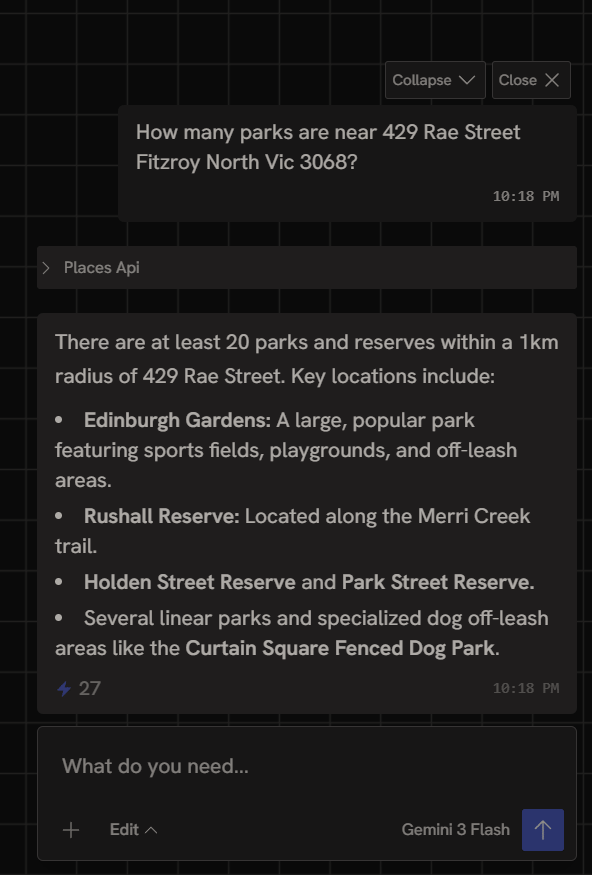 The agent geocodes the address, calls your Places tool, parses the response, and answers in plain language.
## 14. Plug in a third-party planning API
The same pattern applies to any API. As an example, here's a planning data API for Western Australia:
1. Add the API key as a secret named `corbcode`, with allowed origin `https://townplanning-app.salmonflower-34e8b60d.australiaeast.azurecontainerapps.io`
2. Add a Code node and reference the credential as `ENV.corbcode`
```javascript theme={null}
const response = await fetch('https://townplanning-app.salmonflower-34e8b60d.australiaeast.azurecontainerapps.io/api/chat', {
method: 'POST',
headers: {
'Content-Type': 'application/json',
'X-API-Key': ENV.corbcode
},
body: JSON.stringify({
message: message,
max_sources: parseInt(maxSources)
})
});
return await response.json();
```
The response contains a natural-language summary plus a collection of source planning documents. You can publish this as a Tool the same way you did Places.
## What you've built
A complete site research workspace:
* Streetview fetcher (HTML and JavaScript versions)
* Multi-address batch processing
* Image analysis via the Agent node
* 3D environment generation with Marble + custom Rhino import
* Places API tool for nearby search
* Planning API for natural-language queries
All composable. All callable from a chat agent. All extendable by the same pattern: get docs, ask the agent to build a component, secure the credentials, publish as a Tool.
## Next steps
* [Credentials](/concepts/integrations/credentials), the underlying patterns for any API integration
* [Tools, Apps, and Libraries](/concepts/publishing/libraries), full reference for publishing reusable tools
* [Build and publish an artifact](/examples/build-and-publish-an-app), bundle site research into a shareable site report
The agent geocodes the address, calls your Places tool, parses the response, and answers in plain language.
## 14. Plug in a third-party planning API
The same pattern applies to any API. As an example, here's a planning data API for Western Australia:
1. Add the API key as a secret named `corbcode`, with allowed origin `https://townplanning-app.salmonflower-34e8b60d.australiaeast.azurecontainerapps.io`
2. Add a Code node and reference the credential as `ENV.corbcode`
```javascript theme={null}
const response = await fetch('https://townplanning-app.salmonflower-34e8b60d.australiaeast.azurecontainerapps.io/api/chat', {
method: 'POST',
headers: {
'Content-Type': 'application/json',
'X-API-Key': ENV.corbcode
},
body: JSON.stringify({
message: message,
max_sources: parseInt(maxSources)
})
});
return await response.json();
```
The response contains a natural-language summary plus a collection of source planning documents. You can publish this as a Tool the same way you did Places.
## What you've built
A complete site research workspace:
* Streetview fetcher (HTML and JavaScript versions)
* Multi-address batch processing
* Image analysis via the Agent node
* 3D environment generation with Marble + custom Rhino import
* Places API tool for nearby search
* Planning API for natural-language queries
All composable. All callable from a chat agent. All extendable by the same pattern: get docs, ask the agent to build a component, secure the credentials, publish as a Tool.
## Next steps
* [Credentials](/concepts/integrations/credentials), the underlying patterns for any API integration
* [Tools, Apps, and Libraries](/concepts/publishing/libraries), full reference for publishing reusable tools
* [Build and publish an artifact](/examples/build-and-publish-an-app), bundle site research into a shareable site report