> ## Documentation Index
> Fetch the complete documentation index at: https://docs.runchat.com/llms.txt
> Use this file to discover all available pages before exploring further.
# Create a Workflow
> Build your first Runchat workflow: generate parametric image variations using a Create node, a Text Input, and the Tab reference picker. About 10 minutes.
Build a parametric workflow that takes a single design concept and produces image variations from it. By the end you'll have a working three-node workflow you can extend in any direction.
**Time:** 10 minutes
**You'll need:** A free [Runchat account](https://runchat.com/signup) (Google or email signup works)
## What you'll learn
* Adding nodes to the canvas
* Writing a prompt and running a Create node
* Connecting nodes with edges to pass data
* Using an Agent node to generate prompt variations
* Returning a list of outputs from one run
## 1. Open a new workflow
Open [the Runchat editor](https://runchat.com/editor?new=true), click **New Workflow**, then **Start from Scratch**.
Runchat saves automatically whenever you add a node or run something. You can rename the workflow at any time, or press `Ctrl/Cmd + S` to save manually.
## 2. Add a Create node
The [Create](/node-reference/nodes/create) node runs generative AI models for images, video, and 3D. The fastest way to add one is to double-click the canvas and type the model name.
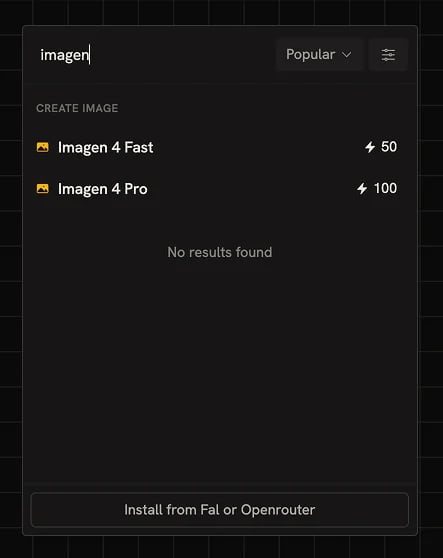
Double-click the canvas, type `Imagen`, and select **Imagen 4 Fast**.
There are several ways to add a node. See [Connecting
Nodes](/concepts/editor/connecting-nodes) for the full reference.
## 3. Write your first prompt
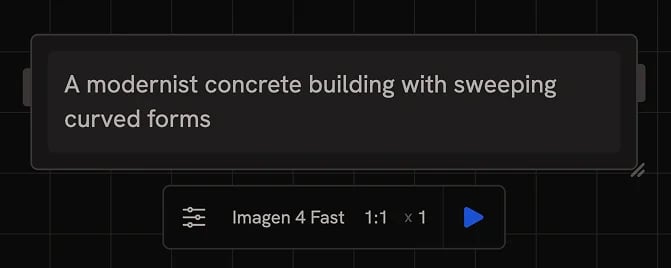
In the prompt input on the Create node, paste:
```text theme={null}
A modernist concrete building with sweeping curved forms
```
Click the blue **Play** button on the node toolbar to run it.
Running a node costs 1 credit, plus the model. Imagen 4 Fast is around 50
credits per image; fast models like Runchat Image are included in the free
usage. Per-model pricing shows next to the model name in the picker. See
[Credits](/concepts/credits) for full pricing.
## 4. View the output
The node flips over and displays the output. Hover the node and click the arrows icon at the top to flip back to the input form.
## 5. Add an Input node
You'll connect a separate Input node so you can change the design concept without editing the prompt directly.
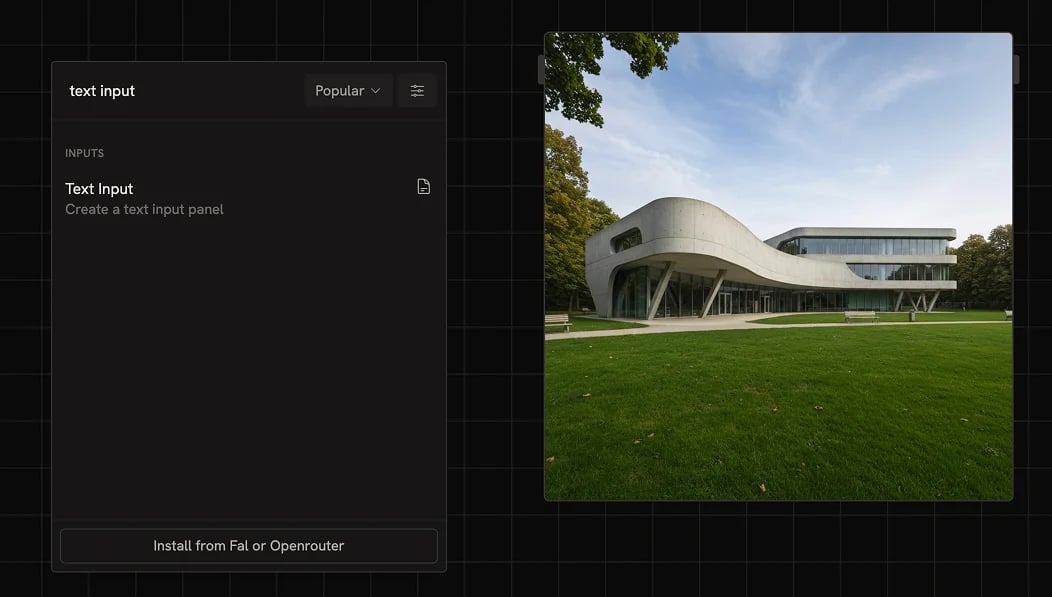
Double-click the canvas, type `text`, and add a **Text Input** node. Move it to the left of the Create node and enter:
```text theme={null}
A modernist concrete building with sweeping curved forms
```
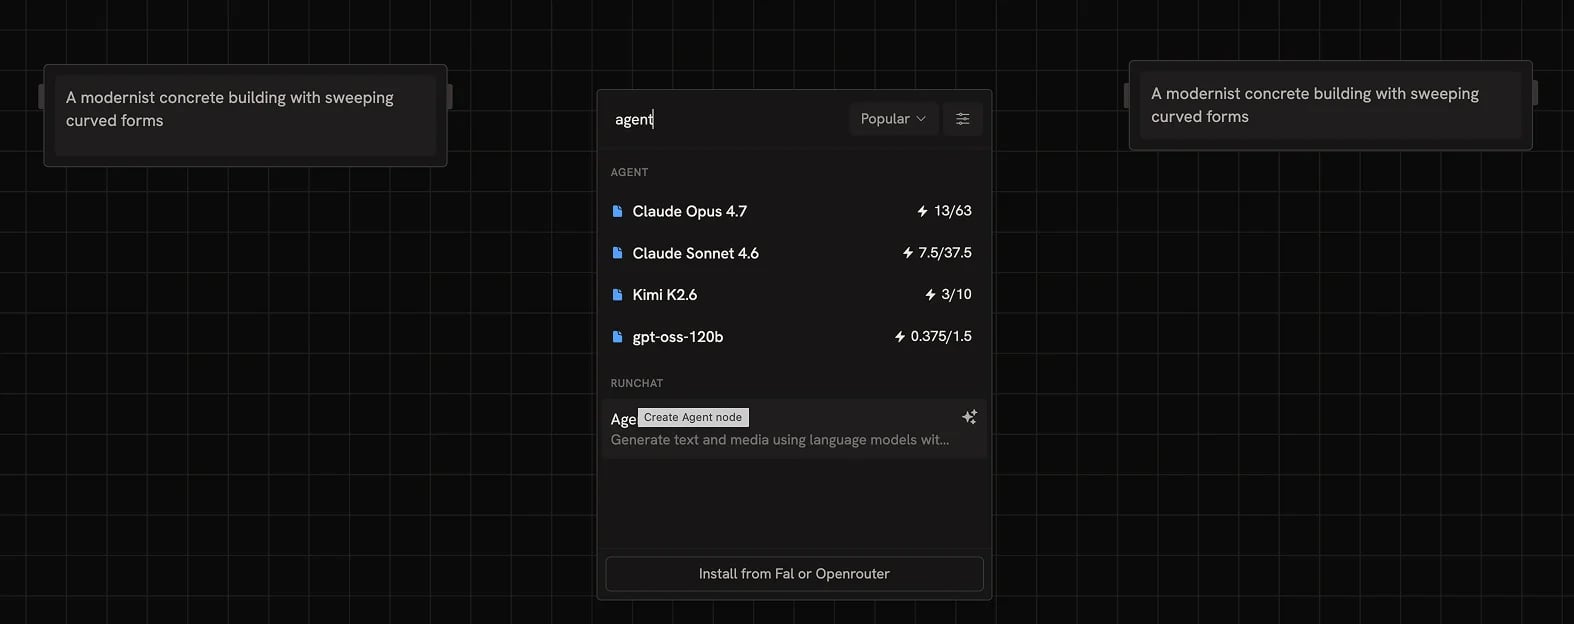
## 6. Add an Agent node between them
Double-click the canvas, type `agent`, and add an [Agent](/node-reference/nodes/agent) node. Move it between the Input and the Create node.
The Agent will read your design concept, produce a list of variations, and feed each one into the Create node as its own prompt.
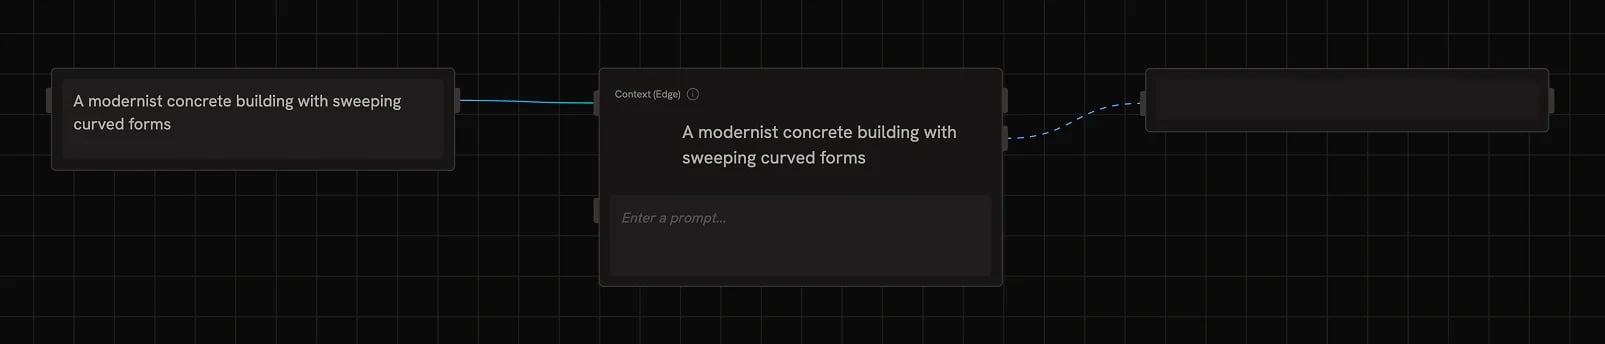
## 7. Wire the three nodes together
Drag from the **output** handle on the right side of the Input node to the **Context** input on the Agent node. Then drag from the Agent's output to the **Prompt** input on the Create node.
Edge colours indicate data type. Text is blue, images are yellow, and so on.
See [Data Types](/concepts/data/data-types) for the full reference.
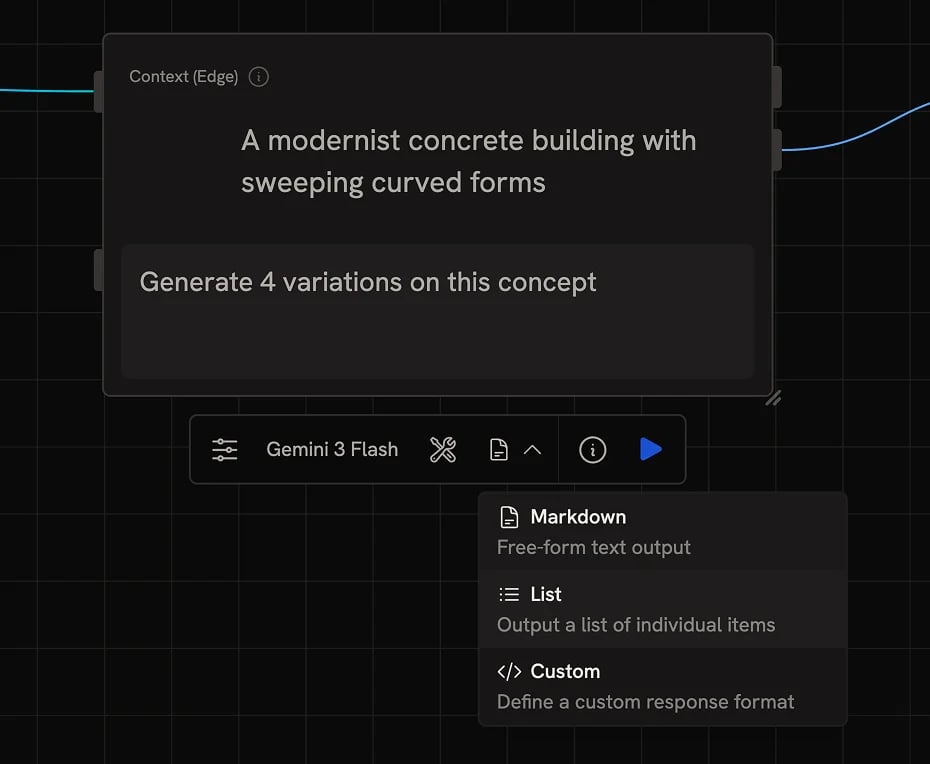
## 8. Configure the Agent for variations
In the Agent node settings bar, change the **output format** from `Markdown` to `List`. This forces the output to a list of values instead of a paragraph.
In the Agent's prompt field, enter:
```text theme={null}
Generate 4 variations on this concept
```
## 9. Run the workflow
Select all three nodes (drag a selection box, or `Ctrl/Cmd + A`) and click **Run** in the selection toolbar. Runchat figures out the order automatically: Input first, then Agent, then Create runs four times in parallel.
When the Agent returns a list, the downstream node runs once per item. This is Runchat's [Each vs All](/concepts/data/data-matching) behaviour: by default each item processes individually. Toggle to **All** if you want all items combined into a single run.
List outputs display in a table view by default. Toggle between table and page
view from the icon in the node settings bar.
## Next steps
* [Iterate on text-to-image prompts](/examples/text-to-image-ideation): extract a single variable like material into its own input and explore variations without rewriting
* [Browse the examples](/examples/text-to-image-ideation): worked recipes for rendering, scripting, site research, and more
* [Use the chat agent](/concepts/agents/chat) instead of the Agent node for an interactive workflow builder
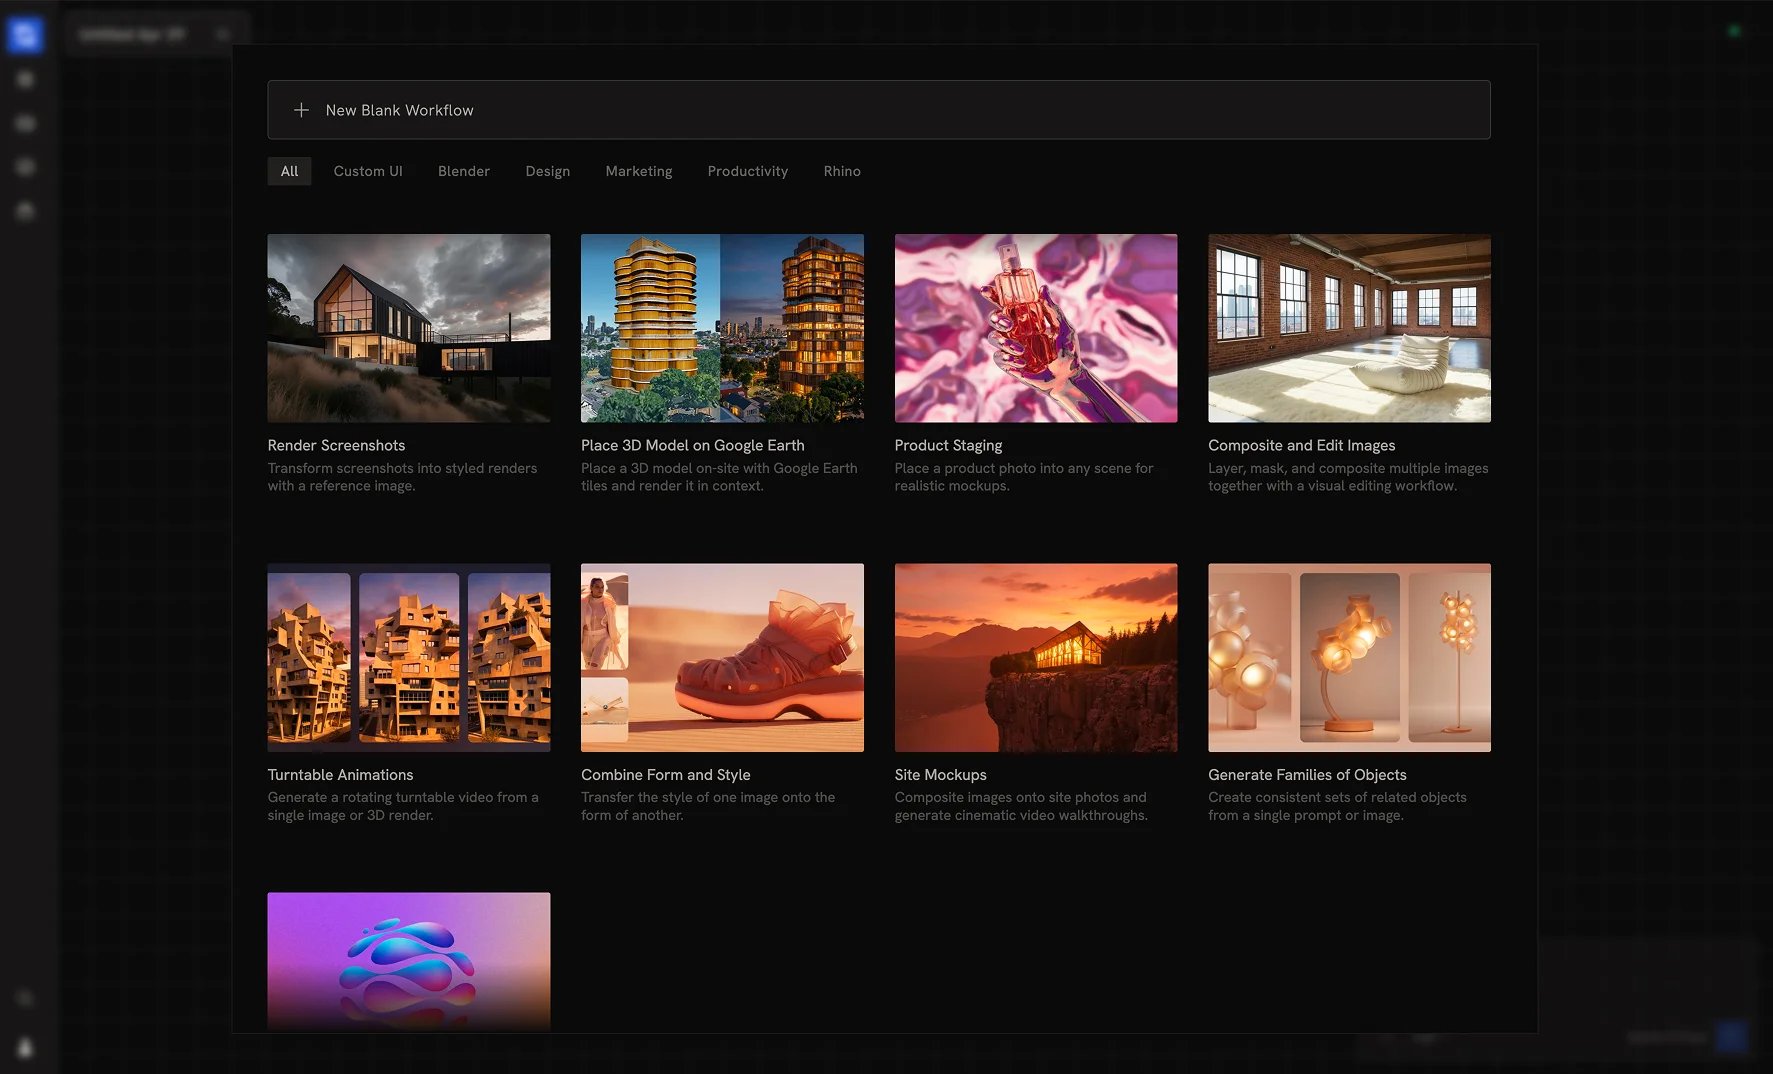 Open [the Runchat editor](https://runchat.com/editor?new=true), click **New Workflow**, then **Start from Scratch**.
Runchat saves automatically whenever you add a node or run something. You can rename the workflow at any time, or press `Ctrl/Cmd + S` to save manually.
## 2. Add a Create node
The [Create](/node-reference/nodes/create) node runs generative AI models for images, video, and 3D. The fastest way to add one is to double-click the canvas and type the model name.
Double-click the canvas, type `Imagen`, and select **Imagen 4 Fast**.
Open [the Runchat editor](https://runchat.com/editor?new=true), click **New Workflow**, then **Start from Scratch**.
Runchat saves automatically whenever you add a node or run something. You can rename the workflow at any time, or press `Ctrl/Cmd + S` to save manually.
## 2. Add a Create node
The [Create](/node-reference/nodes/create) node runs generative AI models for images, video, and 3D. The fastest way to add one is to double-click the canvas and type the model name.
Double-click the canvas, type `Imagen`, and select **Imagen 4 Fast**.
 Click the blue **Play** button on the node toolbar to run it.
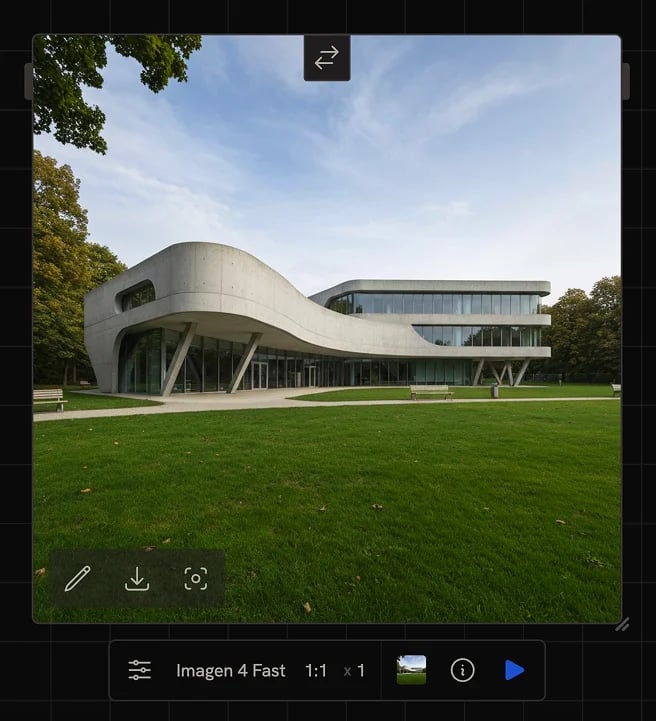 The node flips over and displays the output. Hover the node and click the arrows icon at the top to flip back to the input form.
## 5. Add an Input node
You'll connect a separate Input node so you can change the design concept without editing the prompt directly.
Double-click the canvas, type `text`, and add a **Text Input** node. Move it to the left of the Create node and enter:
```text theme={null}
A modernist concrete building with sweeping curved forms
```
The node flips over and displays the output. Hover the node and click the arrows icon at the top to flip back to the input form.
## 5. Add an Input node
You'll connect a separate Input node so you can change the design concept without editing the prompt directly.
Double-click the canvas, type `text`, and add a **Text Input** node. Move it to the left of the Create node and enter:
```text theme={null}
A modernist concrete building with sweeping curved forms
```
 ## 6. Add an Agent node between them
Double-click the canvas, type `agent`, and add an [Agent](/node-reference/nodes/agent) node. Move it between the Input and the Create node.
## 6. Add an Agent node between them
Double-click the canvas, type `agent`, and add an [Agent](/node-reference/nodes/agent) node. Move it between the Input and the Create node.
 The Agent will read your design concept, produce a list of variations, and feed each one into the Create node as its own prompt.
## 7. Wire the three nodes together
Drag from the **output** handle on the right side of the Input node to the **Context** input on the Agent node. Then drag from the Agent's output to the **Prompt** input on the Create node.
The Agent will read your design concept, produce a list of variations, and feed each one into the Create node as its own prompt.
## 7. Wire the three nodes together
Drag from the **output** handle on the right side of the Input node to the **Context** input on the Agent node. Then drag from the Agent's output to the **Prompt** input on the Create node.
 ## 9. Run the workflow
Select all three nodes (drag a selection box, or `Ctrl/Cmd + A`) and click **Run** in the selection toolbar. Runchat figures out the order automatically: Input first, then Agent, then Create runs four times in parallel.
## 9. Run the workflow
Select all three nodes (drag a selection box, or `Ctrl/Cmd + A`) and click **Run** in the selection toolbar. Runchat figures out the order automatically: Input first, then Agent, then Create runs four times in parallel.
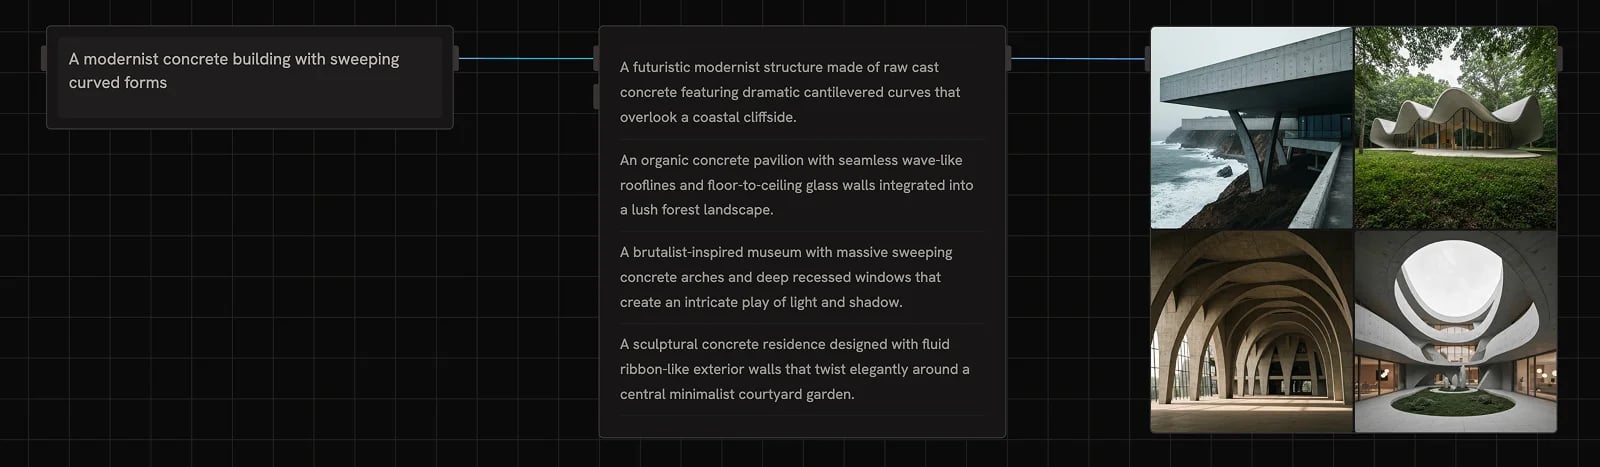 When the Agent returns a list, the downstream node runs once per item. This is Runchat's [Each vs All](/concepts/data/data-matching) behaviour: by default each item processes individually. Toggle to **All** if you want all items combined into a single run.