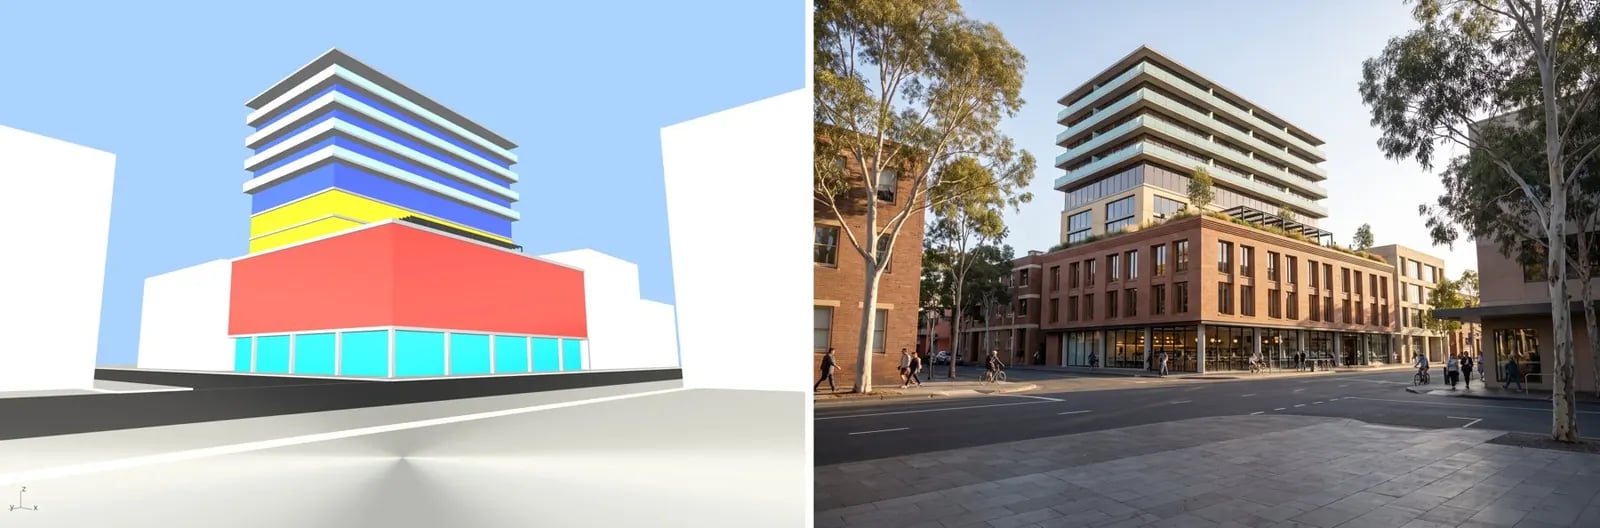
A material map (or clown render) paints every material in a flat, distinct colour. Paired with the linework of the same view, it tells the image model exactly where the brick, glass and concrete go.
A colour-coded material map of a mixed-use building and the photograph rendered from it

Open the example workflow

Make a copy of this workflow in your account to try it with your own images.

How it works

  1. Material map is a flat-colour capture from Rhino: one colour per material, no lighting.
  2. Linework view is the same camera in Pen mode, so edges stay crisp.
  3. Render from material map (Nano Banana Pro) takes both images. The prompt assigns materials by colour, for example Red: three-storey podium in warm red-brown hand-made brick. Cyan: ground-floor retail shopfronts in clear glazing.

Tips

  • Use colours that are far apart (red, cyan, yellow, grey) so the model can’t confuse them.
  • List every colour in the prompt. An unlisted colour tends to come back as a literally painted wall.

Use your own model

The image input holds a capture from our demo Rhino model, so the workflow runs as it is. To use your own model, open Rhino with the Runchat plugin signed in, set up your view, and run the node marked (optional) Rhino. Then drag its screenshot into the image input. The scripts use only the standard display modes and match layers or materials by the keywords in their inputs, so they work on any model.