Training custom models requires a Hobby or Pro subscription
When to reach for a LoRA
Reference images work well for photographic qualities and broad aesthetics. They average out when you try to capture a really specific subject or a distinctive visual language: an artist’s work, your own illustration style, a unique architectural vocabulary. A LoRA is a small adapter trained on 10-30 images. Once trained, every generation is biased toward that look without having to prompt for it. It is the difference between describing a style and showing the model enough examples that it learns the style itself. For comparison: ControlNets enforce structure (depth maps, edges); IP-Adapters condition on a reference image without training. Different problems, often stacked. For capturing an aesthetic, a LoRA is the right tool.Training a LoRA
- Open a workflow on the Runchat Dashboard that has the images you want to train on. (Generate or upload them first if you don’t have them yet.)
- Hover over each image you want to include and click the checkbox in the corner to select it. Pick 10 to 20 images that share either a consistent style or a consistent subject.
- With images selected, click Train LoRA in the gallery selection toolbar at the top of the page.
- Configure the training options in the dialog and click Start Training.
Training is GPU intensive. Costs vary by base model: Flux is around 5,000 credits, Flux Kontext is 6,000, Qwen Edit is 10,000. The exact cost is shown in the training dialog before you confirm.
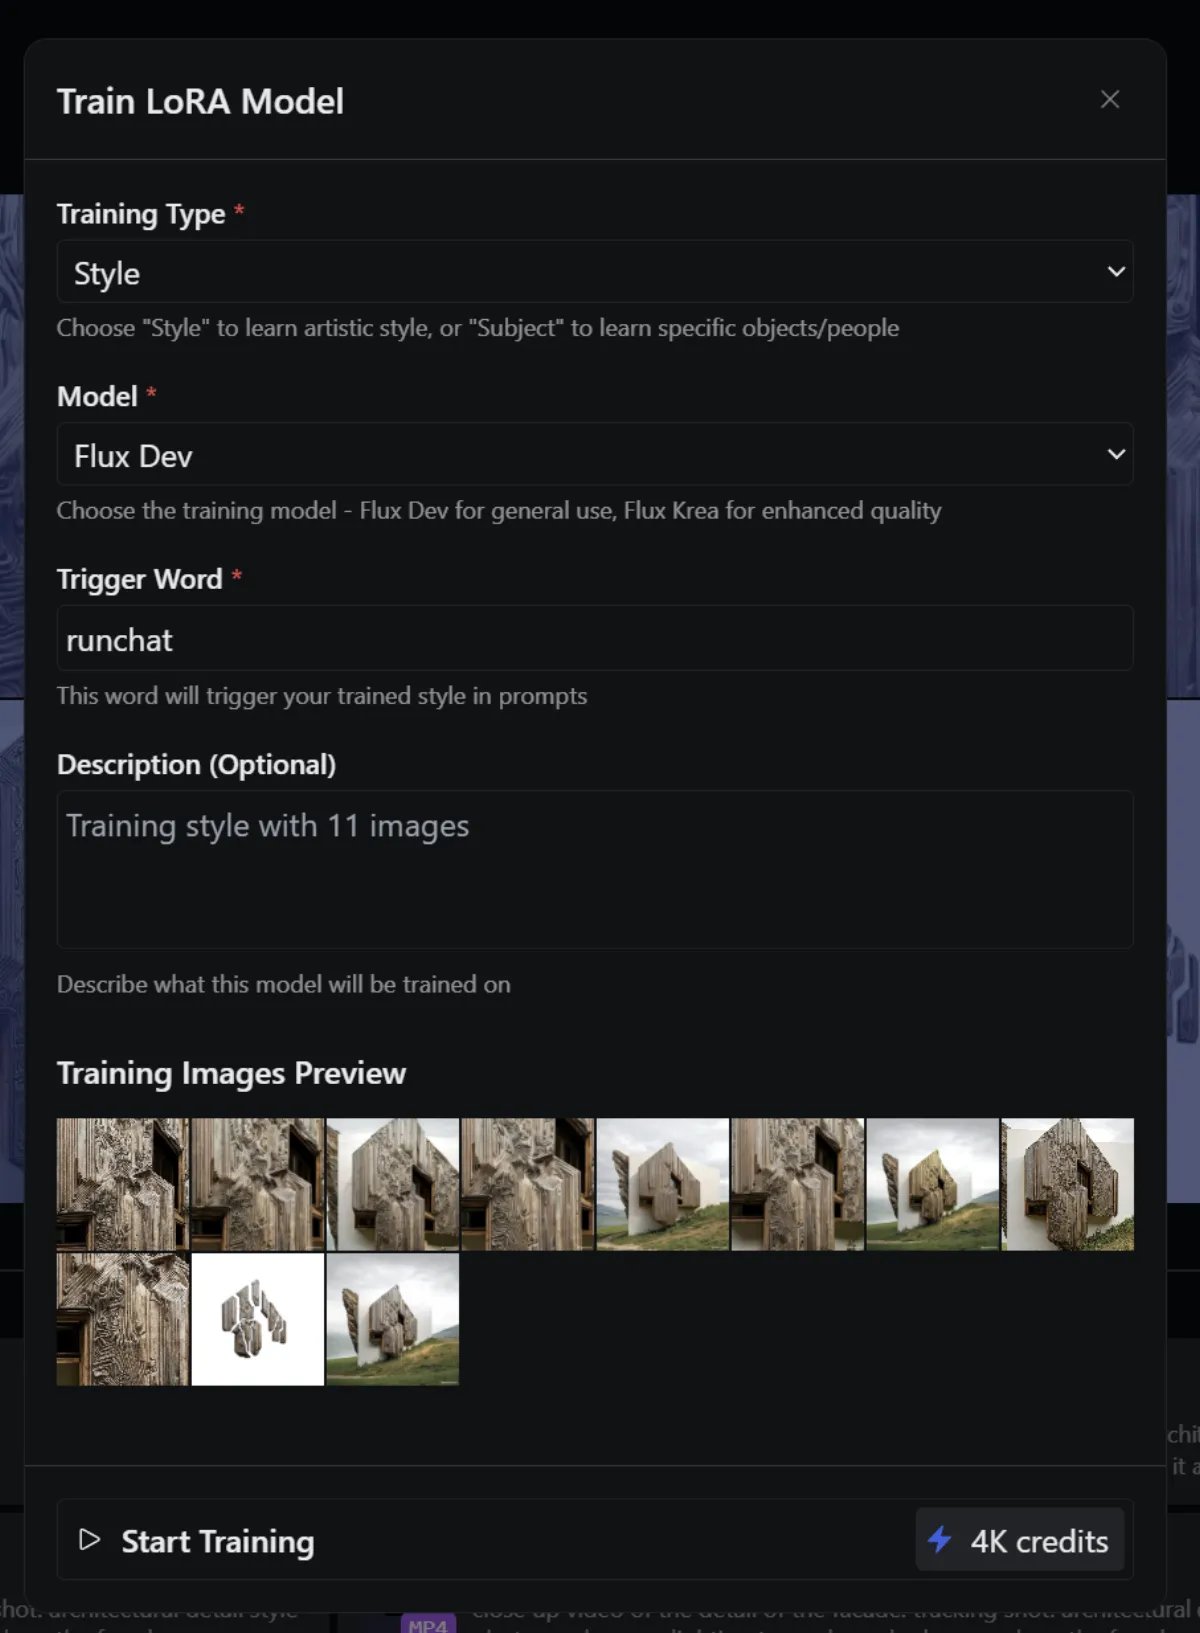
Training configuration
- Style / Subject: train a style LoRA (look and feel) or a subject LoRA (a specific person or object)
- Model: which base model to train on. Options include Flux, Flux Kontext, and Qwen Edit. More appear as Fal adds them.
- Trigger word: a unique word that activates the LoRA in your prompts. Defaults to
runchat. Pick something distinctive so it doesn’t collide with regular vocabulary. - Description: a label so you can find this LoRA later in your library
Checking on a training run
Click Start Training to zip the images and submit the job. Track its status on the Training page. Most runs finish in a few minutes.Using a trained LoRA
Once training completes:- Refresh your browser to reload your profile so the new LoRA appears in your library
- In a workflow, add a Create node and switch its model to Flux LoRA
- In the node’s settings bar, click the LoRA dropdown (defaults to No LoRA) and pick your trained model
- Include your trigger word somewhere in the prompt
- Run the node to verify the LoRA produces the look you trained for
Next steps
- Train a custom LoRA: a worked example with reference images and tuning tips
- Models: how to install and use generative models
- Credits: full cost breakdown across model types