Operation modes
- Create: make a new artifact from connected content
- Update: replace an existing artifact’s content
- Get: fetch the content of an existing artifact
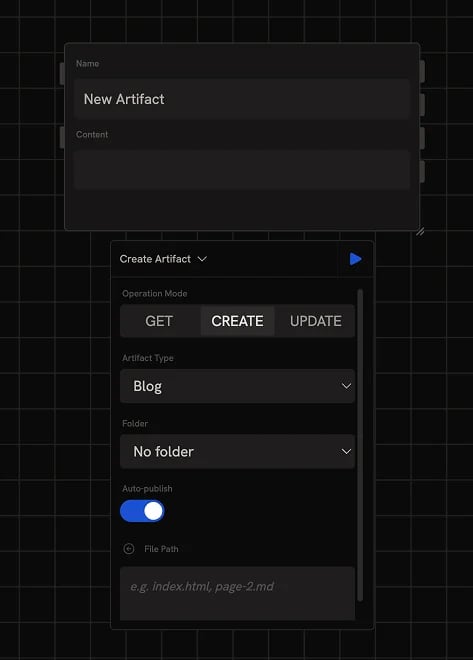
Create mode
Create mode is selected by default when you add a new Artifact node to the canvas. Connect content (markdown, HTML, or generated text) to the Content input and give it a Name.Artifact type
The node tries to infer the appropriate type (website, blog, or slides) from the content’s format. To override, pick a type from the Artifact Type dropdown in the config panel:- Website: HTML pages with optional CSS and JS
- Blog: long-form markdown writing
- Slides: presentation decks
Auto-publish
By default, every run publishes the artifact to the public web immediately. Disable Auto-publish in the config panel if you’d rather review drafts on the Artifacts dashboard before publishing manually.Folders
When publishing many artifacts, pick a Folder in the config panel to organize them. The dropdown lists folders you’ve already created on the Artifacts dashboard, create folders there before assigning them here.Update mode
Update mode replaces an existing artifact’s content. Provide the Artifact ID (either picked from the dropdown or wired in from another node) and the new content.File path
By default, Update writes to the artifact’s entry point file (e.g.index.html for a website, content.md for a blog). For multi-file artifacts, use the File Path parameter to target a specific file or page within the artifact.
Get mode
Get mode fetches an existing artifact’s content. Provide the Artifact ID (from the dropdown or wired in) and the node returns the current content. Useful for chaining: read an existing artifact, transform it with an Agent or Code node, and update or create a new version.Outputs
The node has four output parameters:- Content: the artifact’s content as text. Populated in Get mode; not returned by Create or Update.
- Artifact ID: the artifact’s unique identifier. Newly assigned on Create, passed through on Update and Get.
- URL: the public URL if the artifact is published, in the form
runchat.com/p/<handle>/<slug>. - Thumbnail: the artifact’s thumbnail image URL.
Next steps
- Artifacts dashboard: browse, edit, and publish artifacts
- Agent node: generate the content to feed into an Artifact
- Code node: build HTML or markdown programmatically
- Build and publish an artifact: worked example